Merkle Info-Screens | EFZ Thesis
Translated from German using DeepL and ChatGPT.
Date: March 2023
Reading time: 84 minutes
21.03.2023
Individual practical work
Merkle Info-Screens - Frontend web application
 Figure 1: Merkle info screen
Source: Self-created in Figma
Abstract
Initial situation
At the St. Gallen site of Merkle Switzerland AG, unused screens were hanging on various walls.
unused screens. The aim of this work was to display appealing content on these screens.
on these screens. To achieve this, a new website had to be created from scratch.
This application is designed to display interesting, informative and funny texts on four different screens.
different screens, which were created by an interactive media designer,
designed by an interactive media designer. The screens are elegantly displayed one after the other in an animated sequence.
The application had to be implemented in Nitro, a frontend setup framework.
Implementation
The project was implemented using the IPERKA project management method.
We worked with Visual Studio Code as the development environment and GitLab for data backup and
data backup and logging. The use of Jira provided a good overview of the tasks.
of the tasks.
When implementing this front-end web application, the focus was on the user experience
user experience and the implementation of the desired animations.
As specified, the solution was created using HTML, CSS and JS in a Node environment.
The following four screens were built:
- Welcome: An employee or visitor is greeted on the first screen. The message depends on the day of the week and the time.
- WeatherLocations: The second screen displays reminders and rules. These also also differ depending on the time.
- Input: This informs the viewer about the current weather at three Merkle locations. locations. To determine this, this screen also communicates with an external an external system.
- Joke: A two-part flat joke is intended to lighten things up a little.
Result
The result is an attractive web application that can be connected to the screens via a notebook.
screens via a notebook. It shows an animated, fluid sequence,
which is provided with time- and day-dependent content.
The project has a clean setup and complies with Merkle conventions. Before changes
can be uploaded to the GitLab repository, they are automatically checked for conformity with the rules.
conformity with the rules. It also has an expandable structure. In the future, the run can easily be supplemented with
be supplemented with new screens.
Project structure organization
Several people are involved in this qualification process.
| Role | Abbreviation | Description |
|---|---|---|
| Chief Expert | CEX | Supervision of the IPA. |
| Chief Expert | HEX | Main contact person for KAND and VF. Accompanies VF and KAND through IPA. |
| Secondary expert | NEX | Deputy contact person for KAND and VF during the IPA. Accompanies VF and KAND through the IPA. |
| Vocational trainer | BB | Responsible for the in-company training of the KAND. |
| Supervisor | VF | Person who is available to the CAND as a contact person during the IPA. Contact person for the experts for the respective IPA. |
| Candidate | CAND | The learner who carries out the IPA. |
Mehr zum Qualifikationsverfahren steht in der Bildungsverordnung geschrieben.
Schedule
Legend
The colors of the two Gantt charts are to be interpreted as follows:
 Figure 2: Legend
Source: Self-created in Excel
Target time
 Figure 3: Target time
Source: Self-created in Excel
Actual time
 Figure 4: Actual time
Source: Self-created in Excel
Work journal
The work journal, which describes the activities during the ten days, has been removed from this documentation to improve clarity.
Project documentation
The project is described below from the task definition to the evaluation.
Project management method
A suitable project management method is the prerequisite for efficient development. I examined the most common variants and then decided on the most suitable one. the most suitable one.
Process models can be divided into iterative and sequential types. Iterative
models, such as Scrum, are usually preferred in software development. They
enable the step-by-step development and delivery of small parts of the software in short cycles.
in short cycles.
However, if you already have a complete goal at the beginning, are working alone or want to focus on
documentation, this is probably not the ideal approach.
In such cases, it is better to choose one of the sequential process models, in which
value is placed on clear successive phases. The next activity is not started until the
is only started once the previous step has been fully completed. The focus is on an
planning phase, which aims to minimize ambiguities and changes during implementation.
should be minimized. Strict control and high-quality documentation are also made possible with
most of these models.
The decision was made in favor of the sequential IPERKA model. If IPERKA
all points from the specification can be covered.
In this model, a project is divided into six phases:
- “Informieren”: The first step is to analyze the order so that it is understood in detail. understood in detail.
- “Planen”: Then you start to think about possible solutions.
- “Entscheiden”: Decisions are then made.
- “Realisieren”: In the fourth step, you can get down to implementation.
- “Kontrollieren”: Later, you check whether the task has been implemented correctly.
- “Auswerten”: The last step is to reflect on how the work went.
IPERKA has one disadvantage. Errors are normally only recognized after the complete
recognized. This makes it difficult to react to them.
That is why I will test the individual components during implementation,
before I consider them finished. In the control phase, I will then check the application
holistically for all criteria.
IPERKA is not the only sequential project management method. The commitment
to the waterfall or V-model would not have been wrong either. However, I am familiar with IPERKA
as I was already able to gain experience with it during my time at vocational school.
(Bexio, 2020) (Shiklo, 2019) (Augat, 2022)_
1 Obtaining information (I)
The first step was to understand why it was necessary to fulfill this mission. This makes it possible to better understand the client’s point of view.
The application is intended to liven up the office by displaying information.
When designing the screens, no attention was paid to the corporate design. So
varied inputs scroll across the screen.
The result should contribute to an even more interesting working day.
The screen sequence shown consists of these five parts:
- greeting (Welcome)
- reminders & rules (Input)
- weather locations (WeatherLocations)
- flat joke (Joke)
- reminders & rules (input)
I have visualized this process in Figma:
 Figure 5: Screen loop sequence
Source: Self-created in Figma
1.1 Expandability
The solution should be modular. This is because the sequence of screens must be easy to configure.
It must also be possible to integrate additional screens at a later date.
1.2 Goal
Ultimately, the application should be displayed on a full HD (1920 x 1080 pixel) screen.
screen. To do this, the application must be exported, loaded onto a laptop provided
and connected to the TV via HDMI.
1.3 Ambiguities
After the thorough analysis, one question remained unanswered.
Key question 4, criterion 6:
“The same animation is used for the transitions between screens. The
duration of a transition can be easily configured.”
To be on the safe side, the VF was asked whether it really meant the duration of the transition
the duration of a screen is meant.
However, the criterion is formulated correctly. The time of the transition should be configurable.
Transition means: last layer out, new background in.
The screen duration is then regulated by the screens themselves.
1.4 Project environment
After gaining a basic understanding, it was time to refine the task a little.
to refine the task a little. To do this, I thought about the project environment.
1.4.1 Delimitations
I managed to identify topics that were not part of the assignment.
Design
The design was developed by an interactive media designer. As a frontend
developer, I may deviate from this if I can justify it. However, in this
project it is not my responsibility to make changes to the mockups.
**Assets
All required assets are already organized. The fonts have been purchased and the icons drawn.
My job is to export them correctly.
Calculator and screen
My job does not include setting up the laptop or TV. These are already
already working. An HDMI cable is also ready.
The computer has been set up and has a node version switcher installed to easily switch to the required node version.
Jira creation
Jira is used in this project to track progress. In addition
In addition, the software acts as documentation for future developers.
A Jira project has already been created as preliminary work.
1.4.2 Surrounding systems
Of the four screens, three do not require access to other systems. These access
locally stored, structured JSON files. The WeatherLocations screen is an
exception. It displays the weather at three random locations. This data
cannot be permanently stored in the application. This is because they are currently
not yet known.
But I don’t need to build my own weather station now. As the computer has an
Internet connection, it is possible to access an API.
An API is an interface. This can be used by my application. To do this
I send a request to a so-called endpoint and wait for a response. What exactly
exactly what happens behind this API is not important for my own application.
The order specifies an API called “OpenWeather”.
The company behind this API collects data from weather models, satellites, radars and weather stations.
weather stations.
An API call provides access to the current weather in over 200,000 cities.
This means that all nine specified locations can certainly be covered.
(OpenWeather, 2023)
The weather data for these locations should then be saved by the application for one hour.
Only then does it need to be queried again.
1.4.3 Assets
In this project, there is also a dependency on the fonts and icons. Before
implementation, it must be ensured that these assets work. Therefore
the two fonts were tested to see whether they also encoded umlauts. For both
fonts this is the case.
The icons also had to be examined beforehand. These were exported from the Figma
and opened in the browser. The first time, the frames had unsightly,
transparent lines in them. However, our designer was able to fix this problem.
So I have the certainty that the icons cannot cause any problems.
1.4.4 Visual Studio Code
Visual Studio Code was specified as the IDE.
I will work with version 1.76 from February 2023.
To make development even more efficient, I installed a few extensions during my training. a few extensions during my training. I will also make use of these in this project make use of them in this project:
- Svg Preview: This allows SVGs to be viewed directly in VSC.
- Auto Rename Tag: This extension recognizes the renaming of a tag and automatically adjusts the opening or closing tag automatically.
- EditorConfig for VS Code: This recognizes the existing
.editorconfigfile and applies its settings. its settings are applied.
1.4.5 Nitro
I was told to use the Nitro framework.
Nitro is a frontend setup framework that provides a project with the basic functionalities.
functionalities to a project.
The generator is used to install the small, flexible Node.js application:
https://www.npmjs.com/package/generator-nitro
1.4.6 Conventions
It was described in the order that the Merkle conventions must be adhered to. The exact specifications are set out in the document “Merkle Frontend Conventions IPA”. I have summarized the most important points here.
Readme
Each component is described by a readme.
Atomic Design
An application is built modularly with patterns. Patterns are reusable
components. These must be named meaningfully and assigned to types such as atoms, molecules or
organisms.
Class names must then be chosen in such a way that the type of component can be recognized by the prefix
is recognizable. For example, a class is called ‘a-button’.
More about Atomic Design can be found in the documentation:
https://bradfrost.com/blog/post/atomic-web-design/
Namics BEM
When naming a class, the Namics BEM rule must also be taken into account.
must also be taken into account. BEM is a naming convention. This ensures a modular and
understandable code.
If elements are selected directly via the tags, styling in CSS can quickly become confusing.
quickly become confusing. This approach almost certainly leads to the appearance of some elements being
the appearance of any elements being adapted unintentionally.
The BEM rules provide clarity. These state that the elements block,
element and modifier must be assigned classes.
Block: A unit that can stand alone
Element: A part of the block
Modifier: A variant of a block or element
(BEM, 2023)
The “Convetions-IPA” PDF also indicates the use of two prefixes.
js: A js in front of the class indicates that it is only used in JS.
state: Such classes always have a modifier. They are used in JS and CSS.
**Structure ** The project must adhere to a certain structure. The CSS and JS of a component for example, are always stored in the corresponding folders.
pattern:
css/pattern.scssjs/pattern.jspattern.htmlreadme.md
Conventional commits
When naming the commits and branches, I will stick to the conventional commits
rules. You can find the rules here:
https://www.conventionalcommits.org/en/v1.0.0/
The commits should always be structured like this:
<type>(<scope>): <ticket-no.> <description>Type: One of the available types is used to show what it is.
Scope: Show what is affected.
Ticket no.: Specify the number of the ticket so that it can be tracked later.
Description: A meaningful description in the present tense.
Here is an example:
feat(button): JIRBRD-123 add buttonBranches
The main branch is called master. The develop is branched off from this. From this branch
the other branches are then created. The workflow looks like this:
 Figure 6: Git workflow
Source: Self-created in Pages
Branches are named as follows:
<type>/<ticket-no.>-<ticket-title>MR
Merge requests are titled like this:
<ticket-no.>: <ticket-name>1.5 Discussion
To make sure that I understood everything correctly, I discussed this interpretation of the order with the VF. The order was understood correctly. At the end, I was given a few tips:
- I should outsource and generalize as much as possible.
- The application only has to look good in 16:9 format.
- If something doesn’t work, I should document it.
2 Planning (P)
2.1 Schedule
After gathering information and a precise analysis, the schedule could be drawn up. could be drawn up. The Gantt chart can be seen in Part 1 under “Schedule”.
2.1.1 Rounding
Before the schedule was created, it was defined how detailed the tasks should be planned. As I have many tasks, including small ones, I decided to estimate the work packages to the nearest hour. to the nearest hour.
2.1.2 Interpretation
Time for documentation was included for the tasks during realization.
So if seven hours were scheduled for a screen, part of this time may also be used to document the procedure.
be used to document the procedure.
Note: A line “Unplanned tasks” was subsequently introduced on day 4. On
This can be used to record work that has not been planned. This concerns
This concerns, for example, the implementation of feedback from the expert discussion.
2.1.3 Blocker
No precise time was estimated for the collection of information and preparation of the schedule.
estimated. This is due to IPERKA. After all, it was only possible to plan during the planning phase.
be planned.
At the beginning, however, six hours were blocked for these phases. This blocker can be recognized by the
yellow color.
2.1.4 Actual time
During the ten days, I will enter the times every evening and make a target/actual comparison.
comparison. This will then be recorded in the work journal. In the work journal
I will also note my activities, rounded to 15 minutes.
Note: After the expert visit, it was decided that work lasting at least 30 minutes must be listed.
minutes must be listed.
2.1.5 Milestones
The schedule is long. I therefore created milestones to provide an overview.
| Milestone | Day of achievement planned | Day of achievement |
|---|---|---|
| Setup (Gitlab, Nitro, Linting, Prettier and CI) | 3 | |
| Welcome Screen | 4 | |
| Input Screen | 5 | |
| WeatherLocations Screen | 6 | |
| Joke Screen | 7 | |
| Loop with animation | 7 | |
| Tests successful | 8 | |
| Evaluation completed | 9 | |
| Submitted | 10 |
2.2 Test concept
Before starting the implementation, the tests must be defined.
2.2.1 Test methods
As a great deal of this application can only be checked visually, the application is not tested with
not tested with any unit tests, but manually.
The aim of these tests is to examine functionality, performance and appearance.
appearance.
In a Nitro project, there are already two types of tests that can be easily implemented.
can be easily implemented.
Cypress
Cypress can be used to write automated, functional tests. This involves
checking the functions of a component. A test is implemented,
which must always be passed. After making changes to a component, it is then
quickly recognize whether it still meets expectations.
You can find out more about Cypress on the website: https://www.cypress.io/
However, this application does not have many functionalities that could be easily tested automatically. could be tested automatically. Most of it can only be checked by a person looking at the visual results. visual results.
**Backstop
Visual tests can also be found in the project.
Visual tests can be used to ensure that the appearance of a component or page has not changed.
or page has not changed. To do this, Backstop compares reference images with newly created
screenshots. If there are changes, these are displayed.
This is Backstop’s website: https://github.com/garris/BackstopJS
Using Backstop in this project would be time-consuming. This is because the screens are very animated. This makes it difficult to create the screenshots at the right time.
Conclusion
For the reasons mentioned, automated tests were deliberately avoided. The application should be tested in two different ways:
- Technical: Some tests require looking at something from a technical point of view. So a kind of black box testing. This applies, for example, to checking the URL query parameter, the search for memory leaks, the examination of the browser console and linting.
- TV: The screen is used to test whether the behavior and design meet the requirements. meet the requirements.
For each test case, one of these two terms is specified in the “Type” column. This makes it clear in which environment the tests were carried out. Note: Things relating to the procedure are not tested. This includes, for example compliance with the commit conventions. This will be checked later under “Evaluation”.
2.2.2 Test data
Weather data is provided for test purposes. Nothing else needs to be be observed.
2.2.3 Test environment
Due to the two types of tests, there are also several test environments.
Technical
The technical tests are carried out directly on a laptop.
TV The application is tested on the TV with the following steps:
-
export application: `npm run nitro:server
`
-
copy the
distfolder to the computer via USB stick -
navigate to the
distfolder with the command line -
switch to the correct node version with `nvs use
-
install packages with `npm i
-
start the software: `npm start
-
read the port from the console and open the application in the Chrome browser via localhost open
-
switch on the floor screen and connect the laptop with the HDMI cable
-
adjust the display settings of the computer so that “Only Extended Display” is selected
-
click
F11to display the browser in full screen -
close the laptop
2.2.4 Test equipment
Technical
For the technical tests, a MacBook Pro from 2019, a Chrome browser
and the Visual Studio Code development environment are required.
TV
The following test equipment is used for the test on the screen:
- Screen (Full HD, 1920 x 1080 pixels)
The resolution of the screen is a crucial point. The web application is not responsive, but tailored precisely to this size.
If you want to test on a different device, you have to adjust the dimensions in the browser accordingly. Nevertheless, I give no guarantee that it will work on other devices will work. - Laptop
- Connected to the “Innovating” WLAN (required for communication with the API)
- Chrome browser
- Windows operating system
- NPM (to start the application)
- NVS for installing the node version
- HDMI connection
- HDMI cable to connect the devices
2.3 Test cases
All test cases are defined below. These cover all relevant criteria of the order.
Basic work
| No. | Type | What is being tested? | How is it tested? | Expected result |
|---|---|---|---|---|
| 1.0 | Technical | Creation of Git repository | Go to git.namics.com and check whether the project was created by the user “Kay Wild”. | The repository can be found under personal projects. |
| 1.1 | Technical | Generation of Nitro project | The system checks whether a Nitro project exists. The version is checked in the .node-version file | A Nitro project was created with the latest possible node version. |
| 1.2 | Technical | Runnability Project export | The project is exported and started as described in README.md. | The application is executable. |
| 1.3 | TV | Display screens in loop | The application is opened in the browser and observed for five minutes. | The screens are displayed continuously in the following sequence: Welcome -> Input -> WeatherLocations -> Joke -> Input |
| 1.4 | TV | Randomness of content and color variations | The application is opened in the browser and observed for five minutes. | Random colors and content are displayed. No patterns are recognizable. |
Standards and conventions
| No. | Type | What is tested? | How is it tested? | Expected result |
|---|---|---|---|---|
| 2.0 | Technical | Quality README.md | The file is searched for in the root of the project. This is read carefully. | The file is meaningful and contains information about the project setup. |
| 2.1 | Technical | Run-Scripts | package.json is examined and the scripts are tried out. | All existing scripts can be executed. No irrelevant tasks are included. |
| 2.2 | Technical | Sensitive data in the repository | The result of a security analyzer is viewed. | The analysis shows that the repository is clean. |
Linting and testing
| No. | Type | What is tested? | How is it tested? | Expected result |
|---|---|---|---|---|
| 3.0 | Technical | Configurations for linting and testing | README.md is read. | It is understandable how linting and testing can be carried out. |
| 3.1 | Technical | Githook | A commit is made. | All scripts listed in package.json under lint-staged are executed. |
| 3.2 | Technical | Prettier and Linter | The following two commands are executed in the console: npm run lint npm run prettier | No problems are reported in the console. |
| 3.3 | Technical | CI pipeline | A check is made on git.namics.com to see whether the pushes have been linked. | It can be seen that the linting script was executed for each push. |
Usability of the application on a screen in the Merkle Office St. Gallen
| No. | Type | What is tested? | How is it tested? | Expected result |
|---|---|---|---|---|
| 4.0 | TV | Display floor screen | Project is exported as described and started on the screen. | The application is displayed correctly. |
| 4.1 | TV and technical | Stability | The application is left running on the TV for one hour. The page is then examined in Inspect mode. | After one hour, neither memory leaks nor errors in the browser console are recognizable. |
| 4.2 | TV | Animations | Launched application is monitored in the browser. | The animations are displayed without stuttering. |
| 4.3 | TV | Date and time control | URL query parameter is tested. Three different days and times are tried out. Example: ?date=2023-02-20&time=09-30 | The screens must display data that matches the day of the week and the time. |
| 4.4 | TV | Transitions | The screen transitions are viewed precisely. | The animations between the screens are smooth and without pauses. |
| 4.5 | TV and technical | Outsourcing animation duration | The first step is to check whether the same transitions are displayed between the screens. The code is then examined. It should be easy to change the duration there. | The same transitions are used between the screens. The duration of the transitions should be configurable in one place for all screens. |
Screen Welcome and Input
| No. | Type | What is being tested? | How is it being tested? | Expected result |
|---|---|---|---|---|
| 5.0 | Technical | Storage of content and rules | Check in the project whether the data is properly structured. | A properly structured JSON file should be present. |
| 5.1 | TV | Animations | The application is started, and the animations are viewed. | The elements should appear and disappear according to the design specifications. |
| 5.2 | Technical | Compliance with rules | Compare with the rules to check whether the correct content is being displayed. | The content selection should be adhered to precisely. |
| 5.3 | TV | Font | Check how the font looks. | The specified web fonts (Plage Bold and Proxima Nova) should be displayed. The text should be centered. |
| 5.4 | TV | Display of Welcome Screen text | Check the Welcome Screen. | The greeting text and optional secondary text should be displayed each on one line. |
| 5.5 | TV | Display of Input Screen text | Manipulate the screen data to display a long text, then check the Input Screen. | The text should not extend beyond three lines, even if the text is very long. If the text is too long, it should be truncated with ellipsis. |
Screen Joke
| No. | Type | What is being tested? | How is it being tested? | Expected result |
|---|---|---|---|---|
| 6.0 | Technical | Storage of content | Check in the project whether the data is properly structured. | A properly structured JSON file should be present. |
| 6.1 | TV | Display of text | The screen is checked with jokes of varying lengths. | The text should be displayed in a fixed size. If the text is too long, the font size will be reduced. |
| 6.2 | TV | Animation | Check how the joke fades in and out. | The text should fade in and out according to the design specifications. |
| 6.3 | TV | Pulsing | While watching the screen, check the pulsing effect. | The first text should pulse twice and be displayed for about eight seconds. The second part should pulse only once. |
| 6.4 | TV | Background color | Observe the screen over several cycles. | The background color is randomly selected for each cycle, with no noticeable patterns. |
| 6.5 | Technical | Configurability | Search the code for a place where the duration of the animation can be configured. | The parameters for the display durations should be identifiable and configurable. |
Screen WeatherLocations
| No. | Type | What is being tested? | How is it being tested? | Expected result |
|---|---|---|---|---|
| 7.0 | TV | Animation | Observe how the screen animates in and out. | The screen should animate according to the specification. |
| 7.1 | TV | Location selection | Observe the locations on the screen over several cycles. | Three random locations should be displayed each time, with no noticeable patterns. |
| 7.2 | TV | Display of weather data | Check the displayed weather data on the screen. Verify the temperatures with research. | The temperatures should be accurate and reasonably rounded. The icons should correspond to the correct values. |
| 7.3 | TV | Caching of data | The list of locations is reduced to three. After a cycle, all locations should be cached. The computer is then disconnected from the internet to check if an API request was attempted. | Even though the client has no internet connection, weather data should still be displayed. |
| 7.4 | TV | Color focus | Observe the animation of the screen. | The individual locations should be focused on with color one after the other. The outlines should also be used correctly. |
| 7.5 | TV | Error handling | The computer is disconnected from the internet. After a few minutes, the internet connection is restored. | The screen will be quickly terminated and skipped in future cycles. Once the computer is reconnected to the internet, the screen will be displayed again. |
3.4 Jira Tickets
With the help of Jira tickets, the progress can be continuously tracked. The tickets are structured as follows:
| Content | Description |
|---|---|
| Name | A meaningful name should describe the ticket. |
| Definition of Ready | In the first section, the DoR (Definition of Ready) criteria are described. It lists what needs to be completed before work can start on the ticket. |
| Todo | Under Todo, the task is described. This section may also include additional notes. |
| Definition of Done | The last section contains the acceptance criteria. A ticket is considered finished only when these criteria are met. |
The tickets are placed on a Kanban board, which has four columns: BACKLOG, SELECTED FOR DEVELOPMENT, IN PROGRESS, and DONE.
All previous tickets are required to complete this task and are therefore placed under SELECTED FOR DEPLOYMENT.
If new ideas for improvements or extensions arise during development, tasks can be created in the backlog.

Figure 7: Jira Kanban Board
Source: Screenshot Jira
The prioritization was done directly during the creation process. The higher up a task is, the more relevant it is.
The order was taken from the schedule.
2.5 Data Backup and Versioning
It is important that data is protected from loss. Additionally, restoring older versions is also beneficial.
The source code is stored on GitLab, so it is versioned and logged. Local changes are pushed at meaningful intervals.
The documentation and the schedule are stored on the company’s internal SharePoint and the VF is released. A new main version is created every day.
Additionally, I back up the documents daily to a USB stick.
2.6 Weather API
To visualize the communication between the components, a flowchart was created.

Figure 8: Flowchart Communication
Source: Created by me in lucid.app
2.6.1 AJAX
AJAX stands for “Asynchronous JavaScript and XML”. AJAX is not a programming language, but a technique to reach a web server from a website.
Over the years, several technologies have emerged that use this method. Fetch is currently the most modern and powerful variant. It was released in 2015 and shares similarities with the older XMLHttpRequest but offers better and more flexible features.
Nearly all developers, including those from platforms like Amazon and YouTube, prefer this method due to the following advantages:
- Modern and simple syntax
- Many features (GET and POST, JSON, headers)
- Lightweight
- Simple error handling
- Supported by modern browsers
- Asynchronous behavior
2.6.2 Error Handling
An API is also a dependency. Therefore, it must be handled when it is not reachable. This happens in two cases:
- When the API goes down. According to the website, the interface has an uptime of 95 percent. Downtimes can occur. (OpenWeather, 2023)
- If the computer’s internet connection fails.
In such cases, the screen should be terminated as quickly as possible. Then, it should automatically check if the API is reachable again.
2.6.3 Mock Data
According to the API’s specifications, 60 calls per minute and one million per month are free.
For testing, mock data will still be created. Mock data are pre-made values that can be used to simulate behavior. (OpenWeather, 2023)
2.7 Data
Not only the weather screen, but also all others require data. This raises the question of where this data should be stored.
2.7.1 Data Folder
A component in Nitro often has a _data folder. This folder stores easily maintainable data, such as titles, texts, or URLs. These data are then directly displayed in the view.
In this project, the data needs to be usable in JS. To achieve this, one would need to first populate the view with this variant and then read the values in JS.
Therefore, this is not the best option.
2.7.2 Public Folder
The public folder is where files are stored that can then be used in the project. Among other things, the assets are stored there.
2.7.3 Routes
In Nitro, custom routes can be defined. A route is an API written in JS. It is possible to store data in the route and then request it. The advantage of this is that the service can take over part of the logic. For example, you can write it so that only three random locations are returned on the request. This way, you don’t have to query all locations and decide within the component itself.
2.8 Architecture
Although it is not easy in this frontend project, I aim to adhere as closely as possible to the 3-layer architecture. The software will be divided into the three layers “Presentation,” “Application,” and “Data Storage.”
Each layer is responsible for a task and communicates with the one directly above or below it.
This ensures that responsibilities are clearly separated, so entire layers can be easily swapped.
In my case, the views belong to the presentation layer. They contain no logic and simply display the data. The application logic resides in the JS.
The data is stored in one of the previously described locations.
In addition to the screens, there will be a controller. However, this is not a typical MVC controller but a helper that controls the screens.

Figure 9: 3-Layer Architecture
Source: Created by me in lucid.app
2.9 Node Version
It is important to use the correct Node version during installation. According to the current requirements, the 16.x and 14.x LTS versions are allowed.
With my installed Node Version Switcher, I will find and install the best possible version.
(NodeJS, 2023) (Merkle, 2023)
2.10 Screen Class
All four screens have common features. Therefore, I believe it makes sense to create a Screen class. This could help avoid redundancy by containing functions that are useful for all screens.
Here’s what this class might look like:

Figure 10: UML Class Diagram Screen
Source: Created by me in lucid.app
However, this is just an idea. During implementation, the attributes and methods may change.
2.11 Fonts
This project uses two fonts:
- Plage Bold Text
- Proxima Nova
3 Decision (E)
In the third IPERKA phase, decisions can be made.
3.1 Nitro Setup
How to generate a Nitro project is described in this guide:
https://github.com/merkle-open/generator-nitro/tree/develop/packages/generator-nitro
During installation, I need to select how the project should be set up. I chose the following setup:
| Query | Explanation | Options | My Choice | Reasoning |
|---|---|---|---|---|
| Desired name | Name of the project | Free choice | merkle-info-screens | Descriptive |
| Desired js compiler | Create a JS or TS project | js / ts | js | I am more experienced in JS. |
| Desired template engine | Whether to use Handlebars or Twig as the template engine. | hbs / twig | hbs | I am more familiar with hbs. |
| Including example code | Whether the project should be created with example code. | y / n | n | I want to start from scratch. |
| Static exporting functionalities | Whether the exporter that can compile and export the files should be included. | y / n | n | The project does not need to be statically exportable. The export should be dynamic. |
| Using client-side templates | Whether to render dynamic data on the client. | y / n | n | I do not need this. |
| Using theming features | Whether to use theming. | y / n | n | I do not need to implement theming. |
3.2 Packages
As a developer, you don’t have to build everything from scratch. There are packages that can help take some of the workload off.
3.2.1 Font Display
With vanilla JS and CSS, it’s not easy to adjust text to fit its parent element. Therefore, I will install a package to take care of this task for me.
I found three suitable packages and compared them:
| Package | Link | Snyk Health Score |
|---|---|---|
fitty | https://www.npmjs.com/package/fitty | 59 |
textfit | https://www.npmjs.com/package/textfit | 51 |
use-fit-text | https://www.npmjs.com/package/use-fit-text | 50 |
The Health Score is calculated by Snyk and provides a value between 0 and 100, indicating the health of a package. This value is calculated based on security, popularity, maintenance, and community involvement.
This is the Snyk website: https://snyk.io/advisor
In addition to the Health Score, I paid particular attention to how well the libraries align with the requirements. To help with this, I focused on the documentation. The cost and size of the packages also had to be considered.
My decision to go with Fitty was made for several reasons. It is…
- … very popular.
- … not too large.
- … already familiar to me.
- … secure.
However, it’s important to note that Fitty is no longer maintained.
After this decision, all the packages are set:
| Name | Description | Link | Snyk Health Score |
|---|---|---|---|
@gondel/core | Allows linking between components and JS in Nitro. | https://www.npmjs.com/package/jquery | 49 |
jquery | jQuery is a JS library that allows for simplified JS code. | https://www.npmjs.com/package/jquery | 93 |
fitty | Automatically adjusts text size to the parent container. | https://www.npmjs.com/package/fitty | 59 |
3.3 Data
In the planning phase, methods for data storage were outlined.
Here, I decide to implement a route.
I will create a JS file under api/service/route that can provide the JSON data.
However, the question remains whether all the data should be retrieved at once and then processed in the components, or if the service should retain the logic and only return specific data.
To avoid sending unnecessary data, I opt for the latter approach.
3.4 Screen WeatherLocations
3.4.1 API
OpenWeather provides data in JSON, XML, and HTML formats. I will request JSON data since this format is very suitable in combination with JS. The JSON data is easy to read and write and can be easily converted into a JS object.
3.4.2 Storage
The retrieved data could be stored for one hour in cookies or LocalStorage. However, this implementation would take time.
For this reason, I will store the weather data in a local variable and tag it with a timestamp. Before each request, I will check if there is still up-to-date temperature information available.
3.5 Keyframes or Transitions
In CSS, animations can be created using keyframes and transitions. I will primarily use transitions. They are ideal for animating between two states. Additionally, transitions are more performant and can be manipulated in JS.
However, I will not limit myself to transitions only. In a few cases, such as with the bubbles in the Welcome Screen, keyframes are a better choice. In these cases, elements need to have more than two states.
3.6 Font Format
For the fonts, several file formats are available to me:
| Abbreviation | Font Type | Description |
|---|---|---|
EOT | Embedded Open Type | This is an outdated format specifically designed for Internet Explorer. |
OTF | Open Type Format | This format was designed to support many characters and be compatible with multiple platforms. |
WOFF | Web Open Font Format | The developers of WOFF aimed to create an outstanding font for the browser, which they succeeded in doing. Since the font is compressed, it loads very quickly. WOFF2 is the newer version, which allows for even higher compression of fonts. |
Due to the mentioned advantages, I decided on WOFF.
(Pandey, 2023)
3.7 Other Conventions
Of course, there are other conventions one might follow, such as marking private JS methods with an underscore before the function name.
I will limit myself to the predefined conventions.
4 Implementation (R)
Once the decisions were made, the implementation could begin.
4.1 Creation of GitLab Repository
A new empty GitLab repository was created under git.namics.com.
In the input form, a name and visibility were specified. It was important to initialize this project without a Readme, as a new setup should be pushed after creation.

Figure 11: Creation of Repository
Source: Screenshot GitLab
After the project was created, I first added the VF with a Developer role.
Then, the repository could be cloned in the terminal using the following command:
git clone git@git.namics.com:kwild/merkle-info-screens.gitNext, I created a master branch:
git switch -c master4.2 Nitro Setup
I completed the setup as planned. Four steps were necessary for this.
4.2.1 Selecting the Node Version
First, I used nvs as the Node Version Switcher to install the latest Major 16 version. The following command was entered in the console:
nvsIn a menu, “Download another version” could then be selected. This displayed a list of all available versions. I selected version 16.19.1 by navigating with the arrow keys and confirming with Enter.
.-------------------------------------------.
| Select a node version                     |
+--/\---------------------------------------+
|  *) node/17.4.0                           |
|  *) node/17.3.1                           |
|  *) node/17.3.0                           |
|  *) node/17.2.0                           |
|  *) node/17.1.0                           |
|  *) node/17.0.1                           |
|  *) node/17.0.0                           |
| [*] node/16.19.1 (Gallium)                |
|  *) node/16.19.0 (Gallium)                |
|  *) node/16.18.1 (Gallium)                |
|  *) node/16.18.0 (Gallium)                |
|  *) node/16.17.1 (Gallium)                |
|  *) node/16.17.0 (Gallium)                |
|  *) node/16.16.0 (Gallium)                |
|  *) node/16.15.1 (Gallium)                |
'--\/---------------------------------------'
Type a hotkey or use Down/Up arrows then Enter to choose an item.
4.2.2 Generate Project
With this version, the project could then be generated. To do so, the following command had to be entered:
npx -p yo -p generator-nitro@latest - yo nitroThis started the setup wizard, where the questions could be answered based on the previously made decisions.
     _-----_     ╭──────────────────────────╮
    |       |    │      Welcome to the      │
    |--(o)--|    │    awe-inspiring Nitro   │
   `---------´   │        generator!        │
    ( _´U`_ )    ╰──────────────────────────╯
    /___A___\   /
     |  ~  |
   __'.___.'__
 ´   `  |° ´ Y `


? What's the name of your app? merkle-info-screens
? What's your desired template engine? hbs
? What's your desired javascript js compiler? js
? Would you like to include theming support? No
? Would you like to include client side templates? No
? Would you like to include the example code? No
? Would you like to include static exporting functionalities? No
Scaffolding your app
4.2.3 Installing Packages
After the installation, Node version 16.19.0 was added to the .node-version file. At that time, this was the highest compatible version with Nitro. To use this version, nvs use was executed.
Then, the project could be installed with npm install.
As described in the “Decision” chapter, additional NPM packages are required for the project. These two commands installed Gondel and jQuery:
npm i @gondel/core
npm i jquery
4.2.4 Cleanup
Finally, the project needed some cleanup. After all, we don’t want irrelevant files and configurations in the repository.
Docker
Docker is not required in this Nitro project. Therefore, I removed all Docker files and scripts in the package.json.
Testing
As described in the test concept, Backstop and Cypress tests can be omitted. For this reason, the test folder and all test scripts were removed from the package.json. The line src/patterns/**/tests/*test.js in the .eslintignore was also removed, as there are no longer any tests present.
Browserslist
Browserslist can specify which browsers the application should ultimately work on. Depending on the configuration, the necessary CSS vendor prefixes are added.
I adjusted the configuration to only support the last three versions of Chrome.
{
  "browserslist": ["last 3 chrome versions", "note dead"]
}
Experimental Decorators
In order to define JS classes without error messages, the setting visible in the image had to be selected.
 Figure 12: Experimental Decorators
Source: Screenshot VSC
Proto
Proto is the development code. It consists of tools for developers, but these are not shown on the production side.
This project does not require development code. Therefore, I removed the proto folder and the imports in head.hbs. Additionally, I emptied the proto.js file.
head.hbs
The head file contains meta tags and JS and CSS links. When removing the imports, I also updated the title and description of the web application. I changed them to “Merkle Info-Screens”.
4.3 Linting and Testing
The goal is to write uniform code. For this, rules need to be defined that the developers must follow. This is the prerequisite for clean code. During linting, it is checked whether these rules are followed.
To ensure linting is working, I ran npm run lint. As shown in the screenshot, linting is already well configured.
 Figure 13: Linter
Source: Screenshot Terminal
Linting is done with the following tools.
| Script | Description |
|---|---|
lint:css | CSS is checked with Stylelint https://stylelint.io/ |
lint:data | The Nitro Environment Linter checks if the patterns are valid. |
lint:html | html-validate is used to check HTML. https://gitlab.com/html-validate/html-validate |
lint:js | eslint is the JS linter. https://eslint.org/ |
lint:license | The licenses of all used production packages are checked by the NPM License Checker. https://www.npmjs.com/package/license-checker |
Prettier is used to format the code according to guidelines. More about the tool can be found on its website: https://prettier.io/
The script makes direct changes to the code.
I tested Prettier with npm run prettier. As shown in the image, it worked from the start.
 Figure 14: Prettier
Source: Screenshot Terminal
I also made an improvement to both the linting script and the prettier script. As seen in the screenshot, file types that are not present in this project were also checked. Therefore, I removed these from the scripts.
 Figure 15: Linting and Testing Scripts
Source: Screenshot package.json
Subsequently, TypeScript (TS) was also removed from this list.
4.4 Githook
A Githook is a shell script that is triggered by a specific action. For the hooks to work, Husky needs to be functional. To do this, chmod +x .husky/pre-commit must be executed in the console.
The process works as follows:
-
When a commit is made, Husky detects it and runs the
pre-commitfile. -
In this file,
lint-stagedis executed:#!/usr/bin/env sh . "$(dirname -- "$0")/_/husky.sh" # if husky config is not in git root # cd ./... || return npx lint-staged -
lint-stagedis configured in thepackage.json. When executed, it runs all the commands specified there, including the Linter and Prettier scripts. This can be seen in the following image.package.json{ "lint-staged": { "src/**/*.{css,scss}": ["stylelint —-allow-empty-input"], "**/*.json": ["prettier —write", "npm run lint: data"], "src/**/*.js": ["prettier -write", "eslint"], "**/*.md": ["prettier -write"], "**/*.yml": ["prettier -write"], "package.json": ["env-linter --saveExact --dependenciesExactVersion"] } }
4.5 CI/CD
Continuous Integration / Continuous Deployment is a process where code is regularly and automatically tested, built, and deployed to a repository or even a production environment.
By automating this process, it ensures that the code is always error-free.
According to the project requirements, linting should run automatically on every push in this project.
4.5.1 .gitlab-ci.yml
The .gitlab-ci.yml file is the CI/CD configuration for a project. The file is placed at the root of the project and defines the pipelines, jobs, and environments.
First, I added this file:
include:
  - template: Jobs/Secret-Detection.gitlab-ci.yml

stages:
  - lint
  - test

lint-job:
  stage: lint
  image: node:16.19.0
  script:
    - echo "Installing project..."
    - npm ci
    - echo "Lint project..."
    - npm run test
4.5.2 Stages and Jobs
A job is a single task. It’s simply a script that is executed under specific conditions and within a defined environment. A stage is a section that holds grouped tasks/jobs. The stages define the order in which types of jobs are executed.
In this case, the lint job is executed first, followed by the test job.
4.5.3 Runners
Now, when a push is performed, the scripts are executed.

Figure 16: GitLab Pipeline
Source: Screenshot GitLab
To use the previously described .gitlab-ci.yml file, a runner is required.
A runner is an external machine that can execute the code.
When creating a runner, you can choose which infrastructure it should run on. However, the common choice is to use shared runners.
Shared runners are runners that are shared across the entire GitLab instance.
To execute the YAML file, a suitable runner from the pool is used.
Therefore, I enabled shared runners in GitLab.

Figure 17: Shared Runners
Source: Screenshot GitLab
4.5.3 Docker
The scripts from the YAML file are generally not executed directly on the runners.
Usually, a Docker image is used to define a suitable environment.
Docker is a tool for using virtual machines, whose configurations (systems and versions) can be defined. This ensures that the code runs in a consistent environment. This is especially advantageous for testing processes. If not all members of a development team are using the same operating system, Docker can also be the solution.
A Docker image is a definition used as a blueprint to build a Docker container. It specifies the required specifications for the container.
In the configuration, I chose a Docker image with Node 16.19.0 installed.
4.5.5 Result
To check if the CI pipeline works, I pushed a test commit.
The result is satisfactory:

Figure 18: CI/CD Pipelines
Source: Screenshot GitLab
4.6 Branches
As planned, I created the develop branch and also the first feature branch:

Figure 19: Erstellung Branches
Source: Screenshot Terminal
4.7 Screen Welcome
The first screen I chose was the Welcome Screen. How I implemented it is described in the following lines.
4.7.1 Embedding Fonts
The screen required two different fonts.
First, I created an appropriate folder structure in the shared folder.
This folder will contain assets and code snippets that will be used in different places. Therefore, it is the right place for the fonts.

Figure 20: Struktur Fonts in shared
Source: Screenshot VSC
In the fonts folder, I placed the WOFF files. Then, in css, I was able to define the so-called font faces. These allow the use of custom fonts. The figure shows how the definition of the Plage-Bold-Text font was constructed.
@font-face {
  font-family: "Plage Bold Text";
  font-display: fallback;
  font-weight: 400;
  src:
    local("Plage Bold Text"),
    local ("Plage-Bold-Text"),
    url("../fonts/plage-bold-text.woff2") format("woff2"),
    url("../fonts/plage-bold-text.woff") format("woff");
}
Afterwards, I had two options available. I could have created a typography file, which would define how the individual fonts behave on different viewports.
To keep the project simple, I decided to import these two SCSS files directly in ui.js, the entry point of the application. This way, the fonts can be used in all other stylesheets without the need for additional imports.
import "./shared/base/webfonts/css/webfont-plageboldtext.scss";
import "./shared/base/webfonts/css/webfont-proximanova.scss";
import "./shared/base/document/css/document.scss";
In document.scss, I then defined the new font as the default. Thanks to the font-face, only the font name needs to be specified.
* {
  font-family: "Plage Bold Text", serif;
}
It is also important to always define a fallback font. This font would be displayed if the main font fails to load.
After that, the font could be used.
 Figure 21: Plage Bold Text on the website
Source: Screenshot Browser
4.7.2 Endpoint
The API was defined under project/routes/data. It consists of the data and a JS file.
routes:
data/messages.jsonhelpersreadme.mdwelcome.js
In the JSON file, the data was structured. There are two arrays. Under greetings, the greetings are stored, which are then displayed with the large font.
secondaryTexts stores the messages that are displayed below.
The structure of the file can be seen in the figure. Of course, this file actually stores more data.
{
  "greetings": [
    {
      "text": "Guten Morgen",
      "startTime": "00:00",
      "endTime": "10:00"
    }
  ],
  "secondaryTexts": [
    {
      "text": "Bald Wochenende",
      "day": "Freitag"
    },
    {
      "text": "Schön, dass du da bist",
      "startTime": "00:00",
      "endTime": "11:00"
    }
  ]
}
In welcome.js, the endpoint is defined. It provides the /api/welcome/ URL. The Screen component can then query the data through this endpoint. The request always includes a date and a time.
The figure illustrates the request.

Figure 22: Endpoint
Source: Screenshot Browser
The route then converts these strings into a date object. From this, the weekday can be retrieved using date.getDay(). This method returns a number, which can then be used to identify the corresponding weekday.
const weekdays = [
  "sunday",
  "monday",
  "tuesday",
  "wednesday",
  "thursday",
  "friday",
  "saturday",
];
const day = weekdays[date.getDay()];
Afterward, the messages from messages.json are read through the file system and converted into a variable. Once this is done, the filtering is performed based on the time and the weekday just found.
This filtering wasn’t very easy. You had to consider overlaps as well. According to the provided data, it’s possible for one message to be displayed until 11:30 AM, while another starts at the same time. I could have written the code so that the end date would be decisive, which would have delayed the start by one minute. However, this wouldn’t have been clear to the person creating these messages, which could have led to confusion. Therefore, I decided that there should be no overlaps in the time definitions. If a message is to be displayed from 11:30 AM, the previous one can only be shown until 11:29 AM.
After filtering, two arrays filled with messages are available. These arrays may contain multiple messages or none at all. Here’s an example: On Friday evening, both “Bald Wochenende” and “Bald ist Feierabend” are true.
The solution I implemented ensures that the value found first is returned. This way, it can be considered when structuring the JSON file. In the given example, “Bald Wochenende” is displayed because it appears higher in the list.
Finally, two strings are returned as a JSON object. If there’s no matching secondary text, an empty string is simply sent.
4.7.3 Screen Class
As planned, a Screen class was created. This class handles functionalities that are useful for all screens.
So far, I have implemented the following two methods.
Random Color
The screens always require random colors. Therefore, a getShuffledColor() function was created. This function returns a shuffled array with three colors (red, green, and yellow).
Date and Time
Several screens are also dependent on date and time.
Therefore, I implemented a getDateTime() method.
This method first checks whether query parameters were passed in the URL.
The figure shows how this was implemented.
If present, these parameters are returned. If nothing is defined in the URL, the current date and time are used.
getQueryParameters() {
    const search = window.location.search;
    return new URLSearchParams(search);
}

// Returns the dateTime defined in url through query parameter. If nothing is set, the current dateTime is used.
getDateTime() {
    const now = new Date();
    let date = now.toISOString().slice(0, 10); // slices the date so only the year, month and day are used
    let time = now
        .toLocaleTimeString('de-CH', { hour12: false, hour: '2-digit', minute: '2-digit' })
        .replace(':', '-');

    const queryParameters = this.getQueryParameters();
    const queryDate = queryParameters.get('date');
    const queryTime = queryParameters.get('time');

    if (queryDate !== null) {
        date = queryDate;
    }

    if (queryTime !== null) {
        time = queryTime;
    }

    return { date, time };
}
4.7.4 Creating the Component
Next, the component was created.
By running npm run nitro:pattern, a script was executed to assist with the creation. As shown in the figure, the name, type, and other configuration options could be selected.

Figure 23: Pattern Generator
Source: Screenshot Terminal
Request
The Welcome Screen can now call the getDateTime() function to get a date and time. After that, a fetch request is made. This sends the date and time in a GET request to the URL where the endpoint is located.
The screen then receives a response containing a message and optionally a secondary text.
The method that performs this query looks as follows:
async getWelcomeData() {
    // Returns either the url query parameter or current dateTime.
    const dateTime = this.getDateTime();
    return fetch(new Request(`/api/welcome/?date=${dateTime.date}&time=${dateTime.time}`))
        .then((response) => {
            if (response.status === 200) {
                return response.json();
            }
            throw new Error('Something went wrong. Check if the route is ok.');
        })
        .then((response) => {
            return response;
        })
        .catch(async (error) => {
            // eslint-disable-next-line no-console
            console.error(error);
        });
}
Bubbles
The screen also needs to display animated circles. I added them to the markup using divs. Four of the bubbles were colored with the second color from the color array, while the remaining four were given the third and final color.
To make the circles different sizes, I randomly set their height and width using JS. These could have also been set with fixed CSS values, but the current solution fits the concept better. This way, the screen looks different every time it’s loaded.
For positioning, I again used JS. However, care was taken to ensure that the colors remain grouped.
One group of four circles is placed between 40 and 80 percent from the left and 0 to 50 percent from the top.
The other group is located in the bottom left, using values between 50 and 100 percent from the left and 0 to 40 percent from the top.
The elements are not fixed in place but are moved slightly. This was again handled with JS. In a moveBubbles() function, the circles are randomly shifted by a few percentage points. This method is called at an interval of every three seconds.
Text
To ensure the text is as large as possible and always displayed on one line, I installed Fitty with npm i fitty. After that, I was able to apply the library to the fetched text DOM elements. This figure shows how simple it is.
// Apply library - https://github.com/rikschennink/fitty
fitty(greeting);
fitty(secondaryText);
To give the text its special look, I had to draw a border around it and add a shadow using text-shadow. I was able to copy the shadow directly from Figma. For the border, I had to figure out how to define it myself.
body {
  text-shadow:
    -10px 15px rgba(0, 0, 0, 0.95),
    -4px -4px #000,
    4px -4px #000,
    -4px 4px #000,
    4px 4px #000;
}
Here you can see that the text has a black border and shadow, and despite its length, it is still displayed:
 Figure 24: Display of Long Welcome Text
Source: Screenshot Browser
Entry Animation
The animation occurs in the following order:
- The bubbles appear from the top and bottom.
- The bubbles move to the end of the screen.
- The main message fades in.
- The secondary text fades in.
- The secondary text pulses three times.
4.7.5 Result
The built screen looks like this:
 Figure 25: Welcome Screen
Source: Screenshot Browser
4.7.6 Potential for Improvement
Of course, there is always room for improvement:
- Currently, eight divs are placed in the markup for the bubbles. Moving this into a separate bubble pattern would be sensible.
- The endpoint is called on every iteration. However, messages only change every 30 minutes. Therefore, it would make sense to cache the data for a while.
These points have been added to a new ticket and placed in the backlog.
4.8 Closing the Ticket
After the tasks of a ticket were completed, I followed these steps:
-
Refactoring: Overall, the code is refactored at the end. However, I tried to clean up the files a bit.
-
Review of Acceptance Criteria: To ensure the fulfillment of the task, the component was checked against the acceptance criteria.
-
Create MR: Then, a Merge Request (MR) was created. This allows the code to be pushed to the Develop branch.
In the MR, the code is reviewed again to verify whether the pipelines have successfully passed.
The MR for the first screen is visible in the figure below. Figure 26: MR Screen Welcome
Source: Screenshot GitLab -
Merge: Action executed in GitLab.
-
Update Ticket: The MR was linked in Jira, and the ticket was marked as completed.
-
Pull the Latest Version: Finally, switch to the Develop branch locally to pull the latest changes with
git pull.
4.9 Screen Input
The Input Screen displays random reminders and rules. The implementation is described in the following sections.
4.9.1 Data
The challenge with the Input Screen was the logical structuring of the data.
There were two options for structuring:
- Create categories like “always” and “monday” and assign texts to them.
- List each text only once and associate it with an array, specifying when it should be displayed.
I opted for the second approach, as it led to a more organized result. This way, a text only needs to be updated in one place.
{
    "text": "Dream. Do. Deliver.",
    "shown": ["always"]
},
{
    "text": "Definiere 3 Ziele für diese Woche!",
    "timeslots": ["monday", "tuesday"]
},
{
    "text": "Timesheet bereit zum Absenden?",
    "shown": ["friday"]
}
As with the Welcome Screen, an API was also built here. It reads the inputs and collects those that match the appropriate time period or day. The texts that can always be displayed are also selected.
The figure shows how all matching inputs are stored in an array.
// Get inputs that either match the part of the day or the weekday
const filteredInputs = inputsArray.filter(
  (input =
    input.shown.includes(dayPart) ||
    input.shown.includes(day) ||
    input.shown.includes("Immer")),
);
When a request is made to the interface, a random entry from this array is returned.
4.9.2 Text
The text must be centered and displayed over a maximum of three lines. To achieve this, the -webkit-box layout was used. The image shows how the text can be displayed accordingly with five lines.
.s-input__text {
  display: -webkit-box; // enables an older layout mode
  -webkit-line-clamp: 3; // allows three lines
  -webkit-box-orient: vertical; // orientation of the box - content from top to bottom
  hyphens: auto; // adds hyphen to long words
  text-align: center;
}
Here it is easy to see that the styles are effective.

Figure 27: Display of long Input Text
Source: Screenshot Browser
4.9.3 Pulse Util
This text also needs to pulse twice. To avoid redundancies in the source code, I outsourced the previously created keyframe into a utility. This way, the pulsing animation can be used in all screens.
4.10 Screen WeatherLocations
This screen informs the viewer about the weather at various Merkle locations.
4.10.1 API
Initially, I read the OpenWeather documentation. After understanding how to query the API, I made a request for the St. Gallen location.
The API then provided me with a lot of information about the weather.
Out of all this data, the screen requires the temperature (main -> temp) and the current weather (weather -> main).

Figure 28: Weather API Response
Source: Screenshot Browser
However, this API needs to be called not once, but three times. I wasn’t initially sure how to make multiple requests simultaneously. While researching, I came across Promise.all(). This allows you to wait for the result of multiple fetches.
(Elias, 2023)
While working with the API, a problem arose. Apparently, the API was returning the weather for the wrong locations. Instead of data for “Vila Real”, it returned data from a city in Italy.
A review revealed that this was due to incorrectly defined coordinates. There are three formats in which coordinates can be stored.
(Google, 2023)
Previously, I was using the first search result from Google, but the API expected a different format. To figure this out, I used a specialized website:
https://www.latlong.net/
Then, another problem arose. For the cities of Hamburg and Lisbon, the API returned the names of neighborhoods (Neustadt and Chiado) instead of the city names.
This happened because the coordinates seemingly corresponded exactly to those districts.
To solve this issue, I overrode the two names in JS. This is noted in the component’s README so that future developers are aware of it and can potentially find a better solution.
4.10.2 Mock Data
Once the response from the API was understood, mock data could be implemented. An additional route was created that returns weather data for the requested location under /api/weather.
When creating the mock data, it was ensured that the structure matched that of the real API, making it easy to switch between the two interfaces.
Also, the data was varied to cover as many states as possible.
To switch to the mock data, simply set the variable useMockData to true.
4.10.3 Random Locations
To get three random locations, a route was created as well. It is accessible under /api/locations and always responds with three different and random locations.
To achieve this, the route fetches a random entry from the list and checks whether it has already been added to the selectedLocations array. A location is only added if it isn’t already in this collection.
4.10.4 Filling the Screens
The screens are filled with JS. The text can be loaded into the HTML. For the temperature, it was important to ensure that the degree symbol is displayed correctly. This is handled by this text: °C.
Additionally, the value is rounded to an integer.
To visually display the weather, icons should be shown. These had to be exported from Figma as SVGs.
During export, multiple file types can be selected. I chose SVG because the graphic remains sharp at any size.
The icons were then placed in the img folder under assets. It’s important to note that all images from there are minified and copied to the public/assets/img folder.
Next, I had to figure out what types of weather could be returned. The following page provided this information:
https://openweathermap.org/weather-conditions#Weather-Condition-Codes-2
To ensure that all types could be represented in some way, I created a list.
This list assigns each type of weather to one of the available icons.
| Returned main value | Icon used |
|---|---|
| drizzle | rainy.svg |
| rain | rain.svg |
| snoW | snow.svg |
| mist | foggy.svg |
| haze | foggy.svg |
| dust | foggy.svg |
| fog | fog.svg |
| sand | unkown.svg |
| ash | fog.svg |
| squall | wind.svg |
| tornado | storm.svg |
| clear | sun.svg |
| clouds | clouds.svg |
The unknown.svg is a gift package.
It is used to ensure that an icon is displayed even for special and unknown weather conditions.
The following icons were not used:
- Snow rain is never returned.
- The cloudy symbol is unnecessary since a cloud can already be used for cloudy weather.
4.10.5 Caching
To avoid unnecessary API requests, the weather data should be cached as planned.
After the initial request is sent to OpenWeather, the data can be stored. In the image, the method used to store the data in an array is visible. The weather data is assigned an expiry. The “expiration date” is set to one hour in the future.
storeWeathers(weatherArray) {
    const now = new Date();

    weatherArray.forEach((weather) => {
        const weatherToStore = {
            expiry: now.getTime() + 3600000, // 1h
            weather,
        };
        this.storedWeathers.push(weatherToStore);
    });
}
The next time, the array will first be checked for valid data. Only if no valid information about the requested location is found will a request be made.
Thus, it is possible that, in one iteration, three or even no weather data needs to be fetched.
4.10.6 Styling
For the layout of the screen, Flexbox was used. This allowed the three boxes and their content to be positioned appropriately as shown in this figure.

Figure 29: WeatherLocations Screen
Source: Screenshot Browser
For the animation, a margin-top value is modified. This causes the three containers to slide in from the top or bottom of the screen.
The focus style, with borders and a green background, is passed under the three boxes via a state-m-weather__container--active class in JS. The screen duration between each focus is split.
As per the specifications, each container must also have an outline. A decision had to be made about whether this should be just a divider between the three boxes or shown all around. The decision was made to show it only as a divider. This is because the TV already frames the webpage with its black border. Adding an additional line would only take up space from the content.
4.10.7 Improvement Potential
The weather could be evaluated and displayed more accurately. Additionally, the border around the numbers does not look optimal. Tickets have been created for these, but they are not addressed in this work.
4.11 Screen Joke
The setup for this screen follows the pattern of the previous ones.
The jokes are stored in a JSON file, and each joke can be requested via the /api/joke route.
Each joke consists of a question and a “punchline”.
The question, as shown in the figure, is displayed first and pulses twice using the previously described Pulse Util. After that, the text is transitioned out. Then, the punchline follows, which fades in slowly and pulses once.

Figure 30: Joke Screen
Source: Screenshot Browser
The text is normally displayed in a fixed size. If there is not enough space, the font size is reduced.
Fitty is already installed in this project. So I first tried to find a solution using the NPM package. Unfortunately, I couldn’t find a suitable one. The problem with Fitty is that when allowing texts over multiple lines, you must set a minimum font size. However, the text sizes would be different for each content, only not going below the minimum size.
But in this project, the requirement was for texts to always be the same size and only shrink when there is not enough space.
To achieve this, I implemented my own function. In JS, I check if the height or width of the text holder is greater than the screen size. If this is the case, it means the text is not fully visible. In such cases, the font size is reduced by ten pixels, and the check is done again.
To make the screen as adaptable as possible, two variables are provided: questionTime and punchlineTime. These determine how long the question and punchline are displayed. The length is configurable.
It is important to note that with very short durations (under three seconds), the animations may not be fully visible.
The README clearly specifies the values that should not be crossed.
4.12 Controller
In order for the screens to be displayed in a smooth sequence, a controller needed to be implemented. This controller is aware of the screens and can start them at the right time.
4.12.1 Sequence
The sequence can be described as follows:
- The controller takes a screen from the loop and starts it.
- The started screen animates itself, presents the necessary content, and also dismantles itself.
- After the screen is finished, it notifies the controller.
- The controller then starts the next screen.
These four steps then repeat.
This process differs only slightly from the planned process in the “Weather API” section of the planning phase. Initially, it was assumed that the controller would also stop the screens.
The following graphic shows the sequence using the example of the Input Screen.

Figure 31: Input Screen Sequence
Source: Created in lucid.app
To enable communication between the controller and the screens, Gondel was used. This allows the components to communicate via event listeners.
4.12.2 Extensibility
The sequence is extensible. To create a new screen, you simply need to create a new component, place it in index.hbs, and add it to the loop.
The loop is shown in the image on the right.
It is important to note that a screen cannot be shown twice in a row. A ticket for implementing this feature is already in the backlog.
this.loop = [
  { name: "input" },
  { name: "welcome" },
  { name: "input" },
  { name: "weather" },
  { name: "joke" },
];
Also, the logic for future screens does not need to be redeveloped. The Screen class already covers all important functionalities with its methods.
4.12.3 Configuration
To adjust the transition duration, the transition variable of the Screen class can be modified. By default, this is set to two seconds.
This value then applies to all screens.
4.12.4 Error Handling
To ensure that the weather screen only appears after a successful request, error handling was implemented. The catch block is used for this purpose. This section of the fetch request is executed if, for example, there is no internet connection.
If the code reaches this block, the abortScreen function is executed. This immediately ends the screen without animation and directly starts the next one. This happens quickly enough that the user does not notice. For the user, it seems like the weather was skipped.
4.12.5 Animation
Three methods were added to the Screen class for animations:
moveIn: This moves a screen in with a transition from right to left.moveOut: This moves the old screen out to the right.resetPosition: This resets the screen to its original position.
4.12.6 Black Border
If two consecutive screens have the same background color, the animation does not stand out. Therefore, a black border was added between the screens.
The simplest solution would have been to set a border or outline. However, I did not like this solution because the line would have been constantly visible.
Instead, I decided to only show the border during the animation. To do this, I just needed to add one line to the existing moveOut method in the Screen class.

Figure 32: Border Between Screens
Source: Screenshot Browser
4.13 Favicon
After all necessary tickets were completed, I was able to implement one from the backlog.
A favicon was generated using https://favicon.io/ and added to the application.
Although it is not visible on the TV, it helps a developer quickly identify the tab while developing.
4.14 Export
In Nitro, a project can be exported statically or dynamically. As previously decided, an export with a server must be possible so that the application has access to the routes.
During the project setup, the two folders locales and server were removed. This caused issues during export. The figure shows that an attempt was made to copy files from these folders into the target folder.

Figure 33: Export Problem
Source: Screenshot Terminal
The VF suggested two solutions:
- Re-add the two folders.
- Remove the two paths from the Nitro configuration in
config/defaults.js.
I chose the first option because it was faster to implement, and I created the two folders with a Readme in each.
4.15 Readme
The README described what the project is, which browsers and screens it is designed for, how a developer can set it up, and what to keep in mind during development and testing.
This template was used as inspiration:
https://github.com/merkle-open/frontend-defaults/blob/master/doc/README.md
4.16 Routes
Here is an overview of all the created routes.
| Name | URL | Request | Response |
|---|---|---|---|
| Input | api/input | Time | Random input |
| Joke | api/joke | - | Random joke |
| Locations | api/locations | - | Three random locations |
| Weather | api/weather | Location | Weather of the location |
| Welcome | api/input | Time | Random greeting with optional secondary text |
5 Control (K)
The fifth phase is dedicated to control.
5.1 Refactoring
Once all necessary tickets were completed, improvements could be made. Among other things, it was checked whether…
- … the code conventions, formatting, and naming followed the current Merkle conventions
- … the project structure adhered to Merkle conventions
- … the “run scripts” in
package.jsonwere logically grouped and did not contain irrelevant tasks - … there were no irrelevant outputs in the console
- … all the README files for the patterns were written properly
The following are the main changes that were made.
5.1.1 Private Methods
During the decision phase, it was decided that private JS methods do not need to be marked with an underscore.
When working with Gondel event listeners, it is mandatory to mark the corresponding methods as private. As a result, it was decided that all private functions should be marked with an underscore. This led to a more consistent codebase.
5.1.2 Linting Routes
The linter was previously configured to pay attention only to the code under src. To ensure that the routes are also checked, an additional rule was added in package.json. As shown in the image, JS files under routes are now linted and tested as well.
{
  "project/routes/*.js": ["prettier --write", "eslint"]
}
5.1.3 jQuery
At the beginning of the project, it was decided to include jQuery. This was done during the setup phase. However, in the end, there were no meaningful use cases for the library. All logic could be implemented with vanilla JavaScript.
To avoid unnecessary code, the package was removed.
5.1.4 Pattern Configuration
Since neither atoms nor organisms were used, these types were removed from pattern.js.
5.1.5 Console Outputs
To ensure that no outputs appeared on the console, all console.log() commands were removed.
Only in the case of an issue with one of the routes will a message be displayed to assist the developer with an error description. However, such errors rarely occur.
5.2 Test Execution
Date: 17.03.2023
Person: Kay Wild
During the setup of the testing environment, it quickly became clear that there would be a few issues. This is because, during development, the components were designed for a full HD (1920x1080 pixels) screen.
When the laptop was connected to the screen, a content shift was immediately noticeable.
This occurred only when expanding the screen - not when mirroring. Since the laptop is to be stored behind the TV with its lid closed, the solution must also work with the device closed.
As a result, the resolution of the TV was checked. Surprisingly, it, along with all other screens in the building, only had a 1280x720 pixel resolution. This was promptly communicated to the VF. They pointed out that this is also a 16:9 ratio. Therefore, if the pixel specifications are adjusted, the content can be displayed properly on this screen as well.
5.2.1 Basic Tasks
| No. | Time | What is being tested? | Result |
|---|---|---|---|
| 1.0 | 13:30 | Creation of Git repository | GitLab repository was created in the private area. 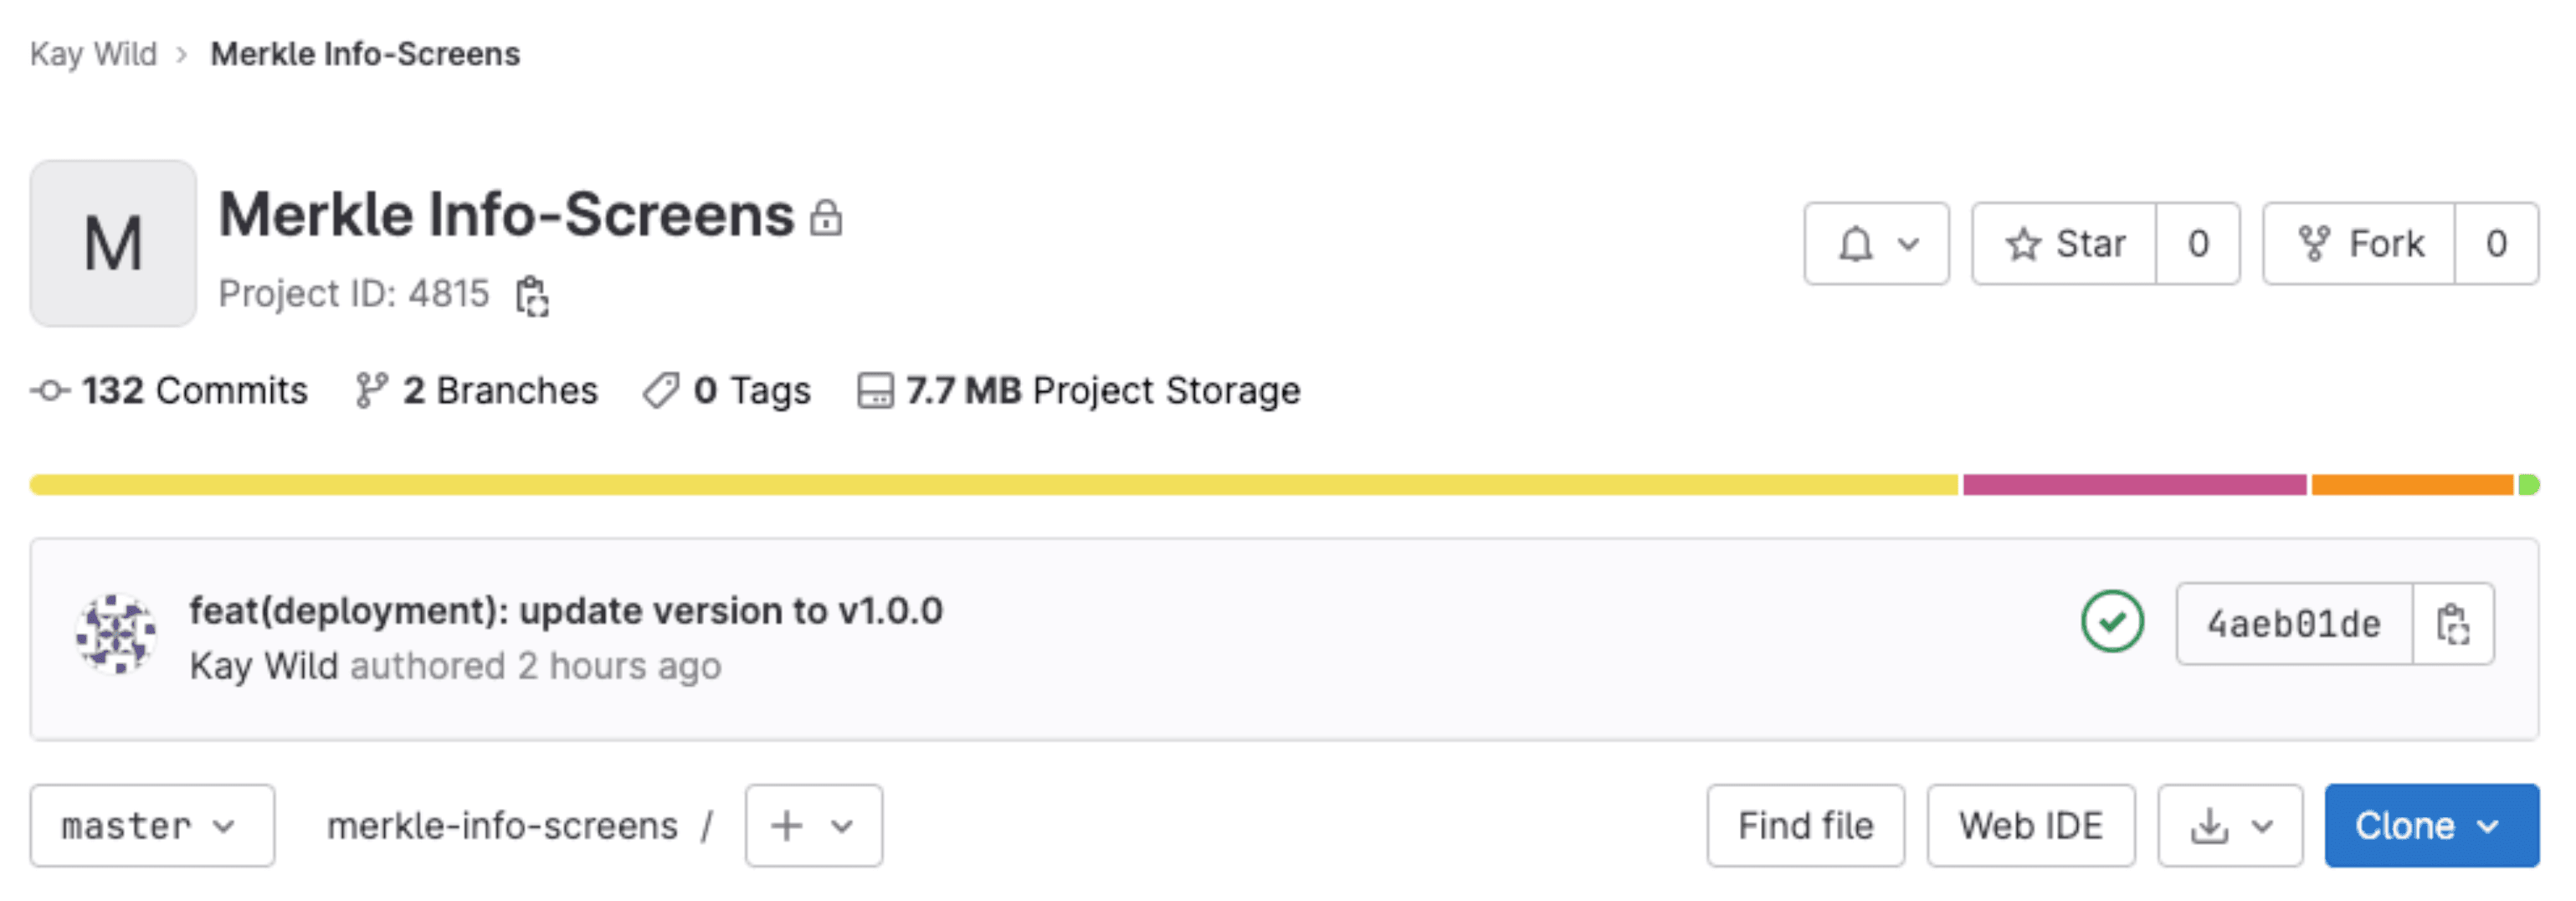 Figure 34: GitLab Project; Source: Screenshot GitLab Figure 34: GitLab Project; Source: Screenshot GitLab |
| 1.1 | 13:30 | Generation of Nitro project | A Nitro project exists. The .node-version file lists version 16.19.0.  Figure 35: Nitro Setup; Source: Screenshot GitLab Figure 35: Nitro Setup; Source: Screenshot GitLab |
| 1.2 | 13:30 | Functionality of project export | An export can be created with npm run nitro:server and started as shown in the figure. This is described in the Readme. 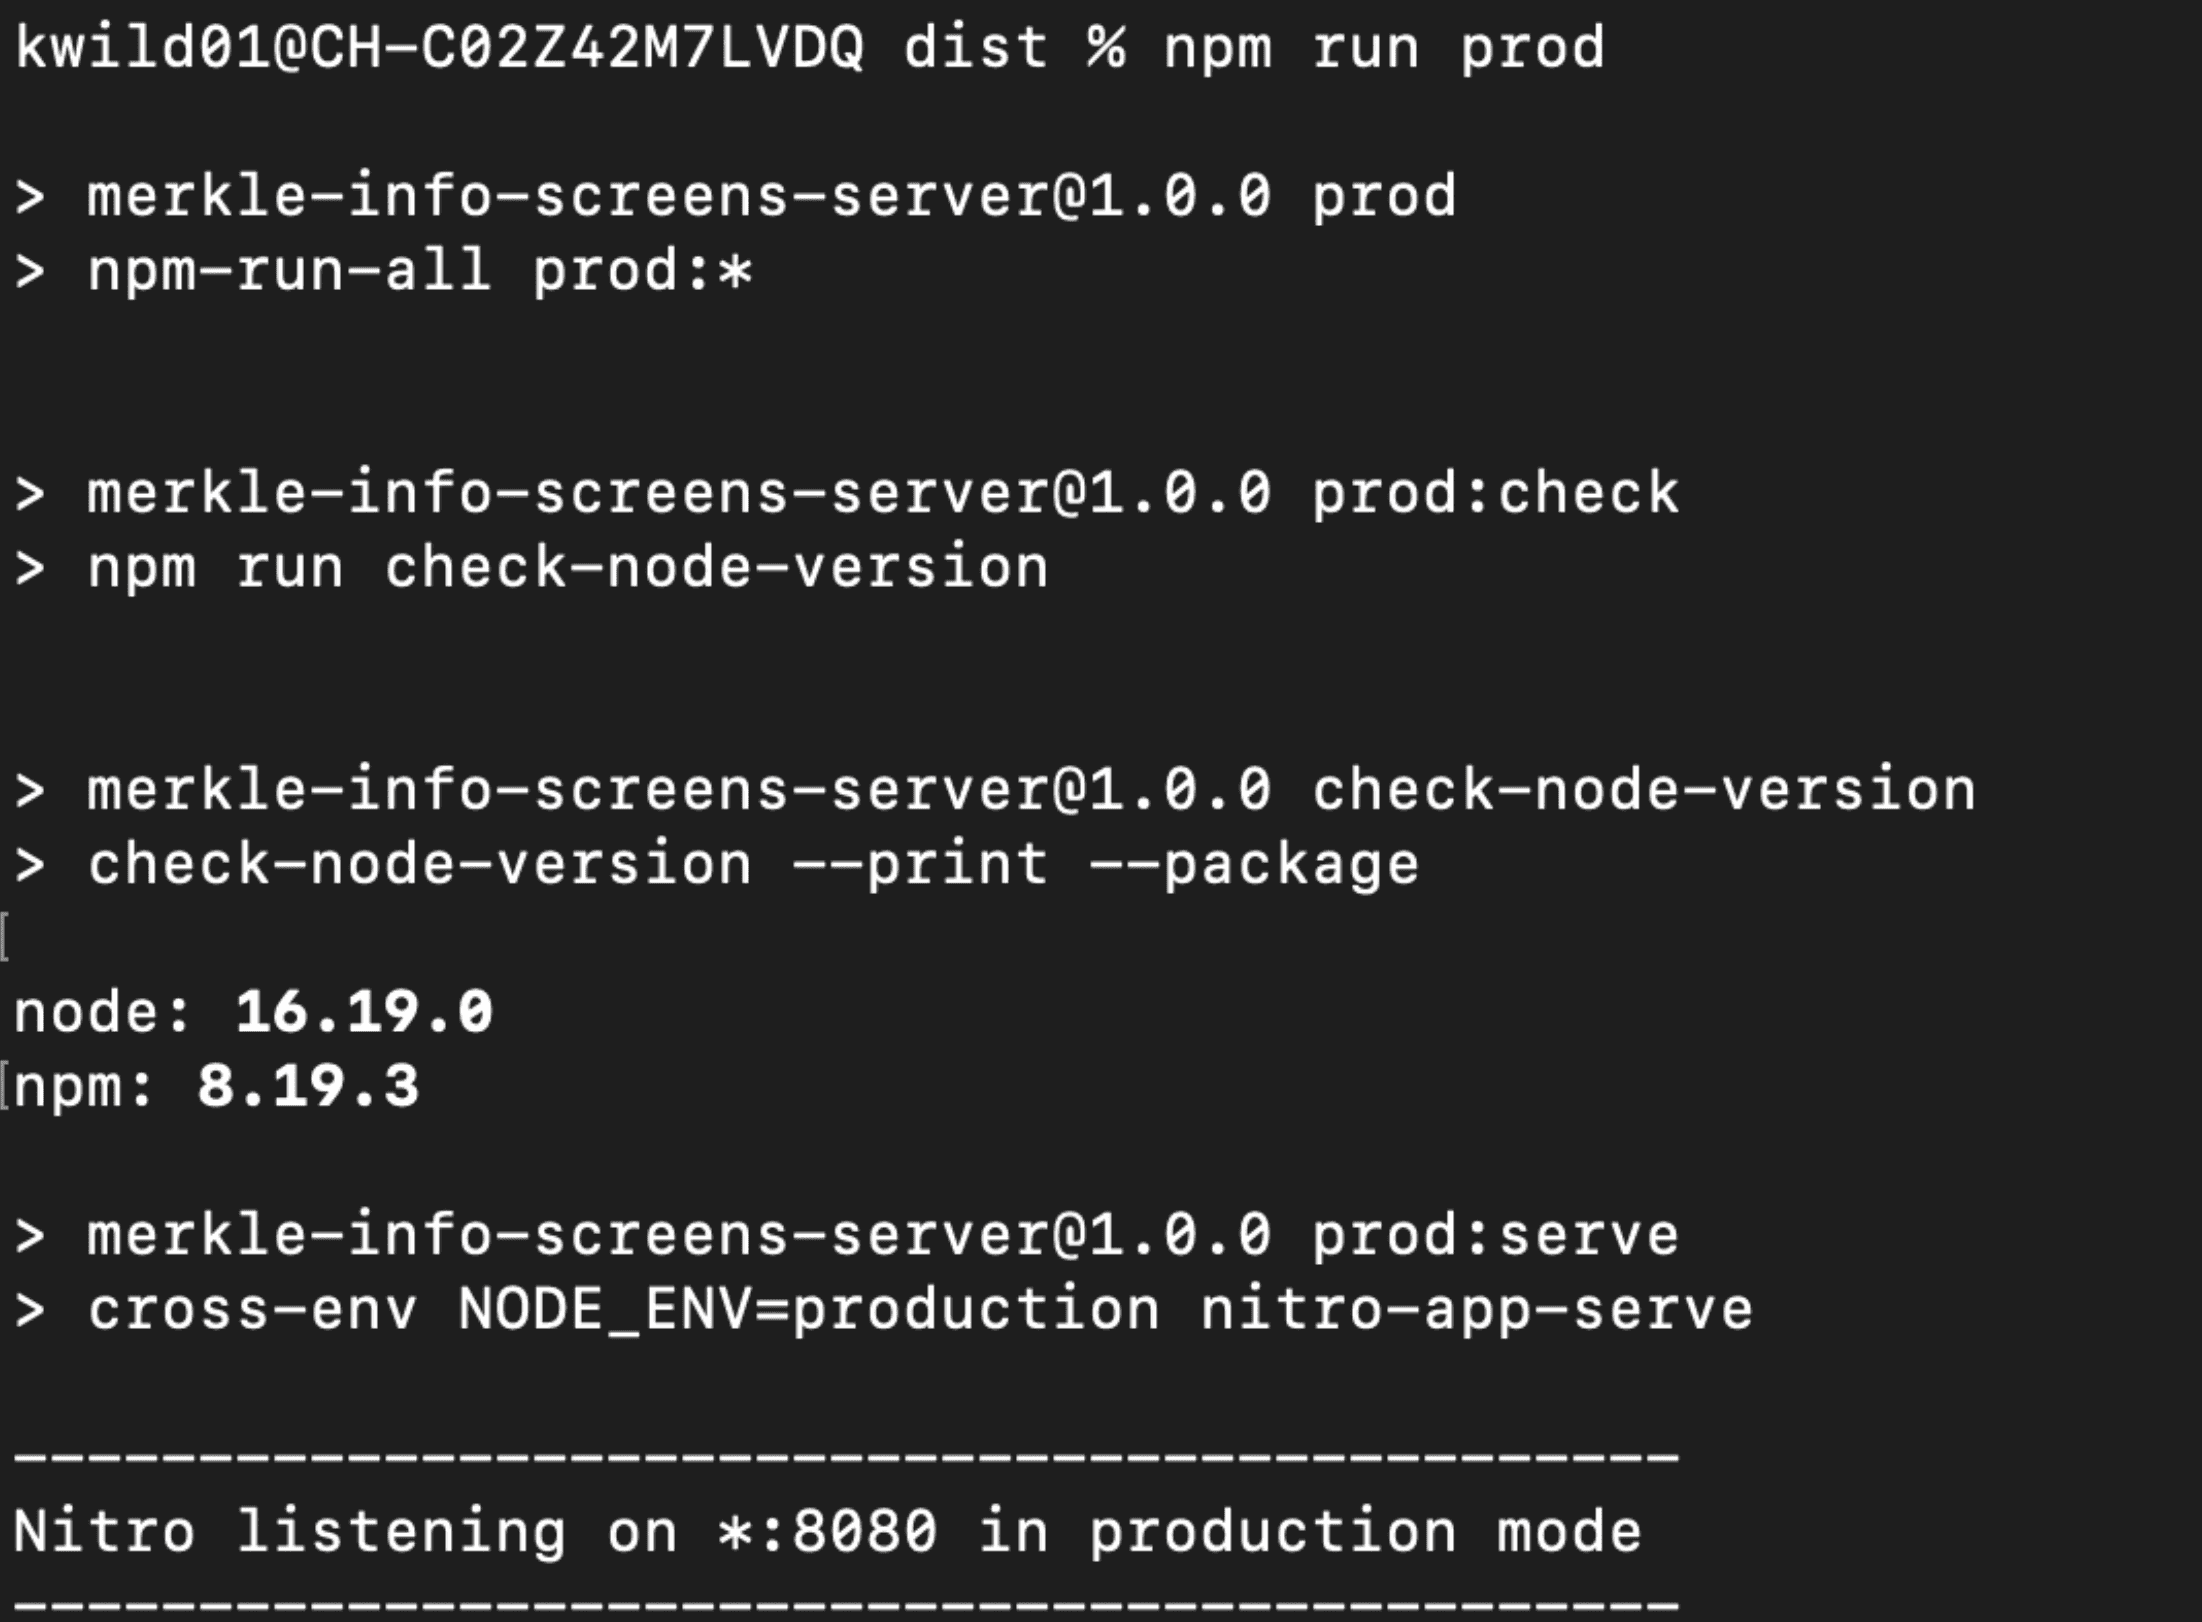 Figure 36: Functional Export; Source: Screenshot Terminal Figure 36: Functional Export; Source: Screenshot Terminal |
| 1.3 | 13:30 | Display of screens in loop | The sequence of the screens is correct even after five minutes. |
| 1.4 | 13:30 | Randomness of content and color variants | After five minutes of observation, no patterns could be detected. The colors and content are random. |
5.2.2 Standards and Conventions
| No. | Time | What is being tested? | Result |
|---|---|---|---|
| 2.0 | 14:00 | Quality of README.md | The Readme contains information about setup, development, testing, and export. An introduction also explains the project. This is visible in the image. 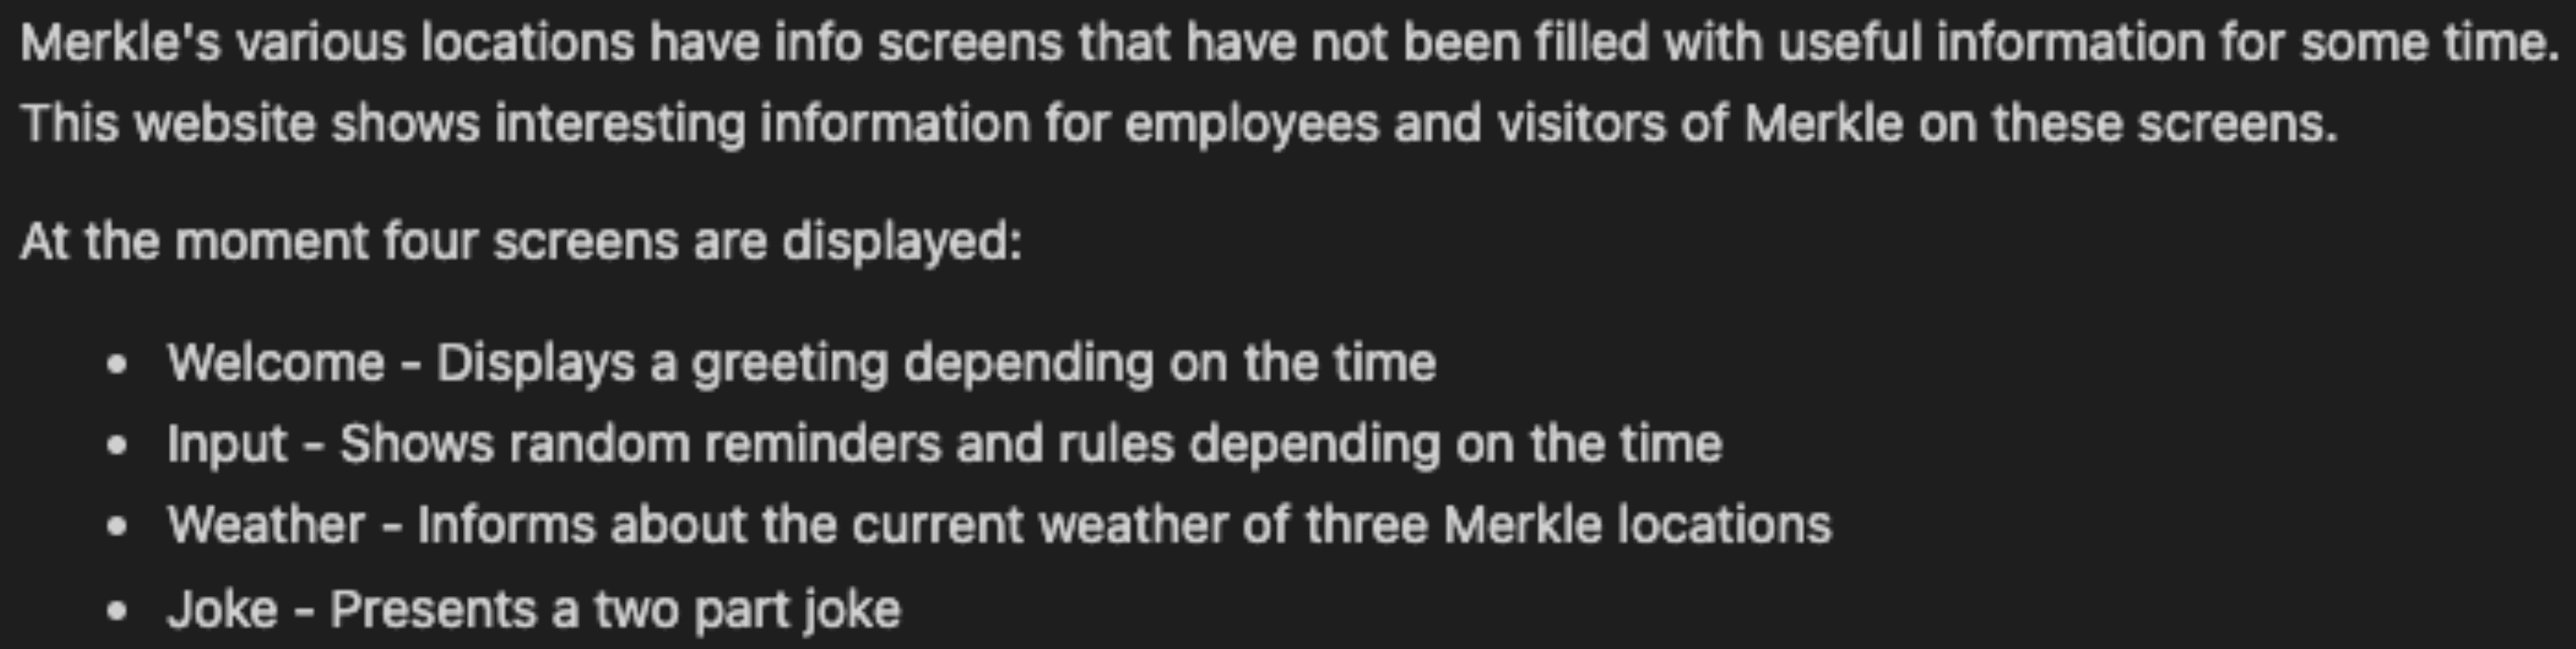 Figure 37: Introduction Readme; Source: Screenshot VSC Figure 37: Introduction Readme; Source: Screenshot VSC |
| 2.1 | 14:00 | Run-Scripts | The scripts were tested with npm run and are working. |
| 2.2 | 14:00 | Sensitive data in the repository | The image shows that according to the Security Job during the Master Merge, the project does not contain sensitive data. 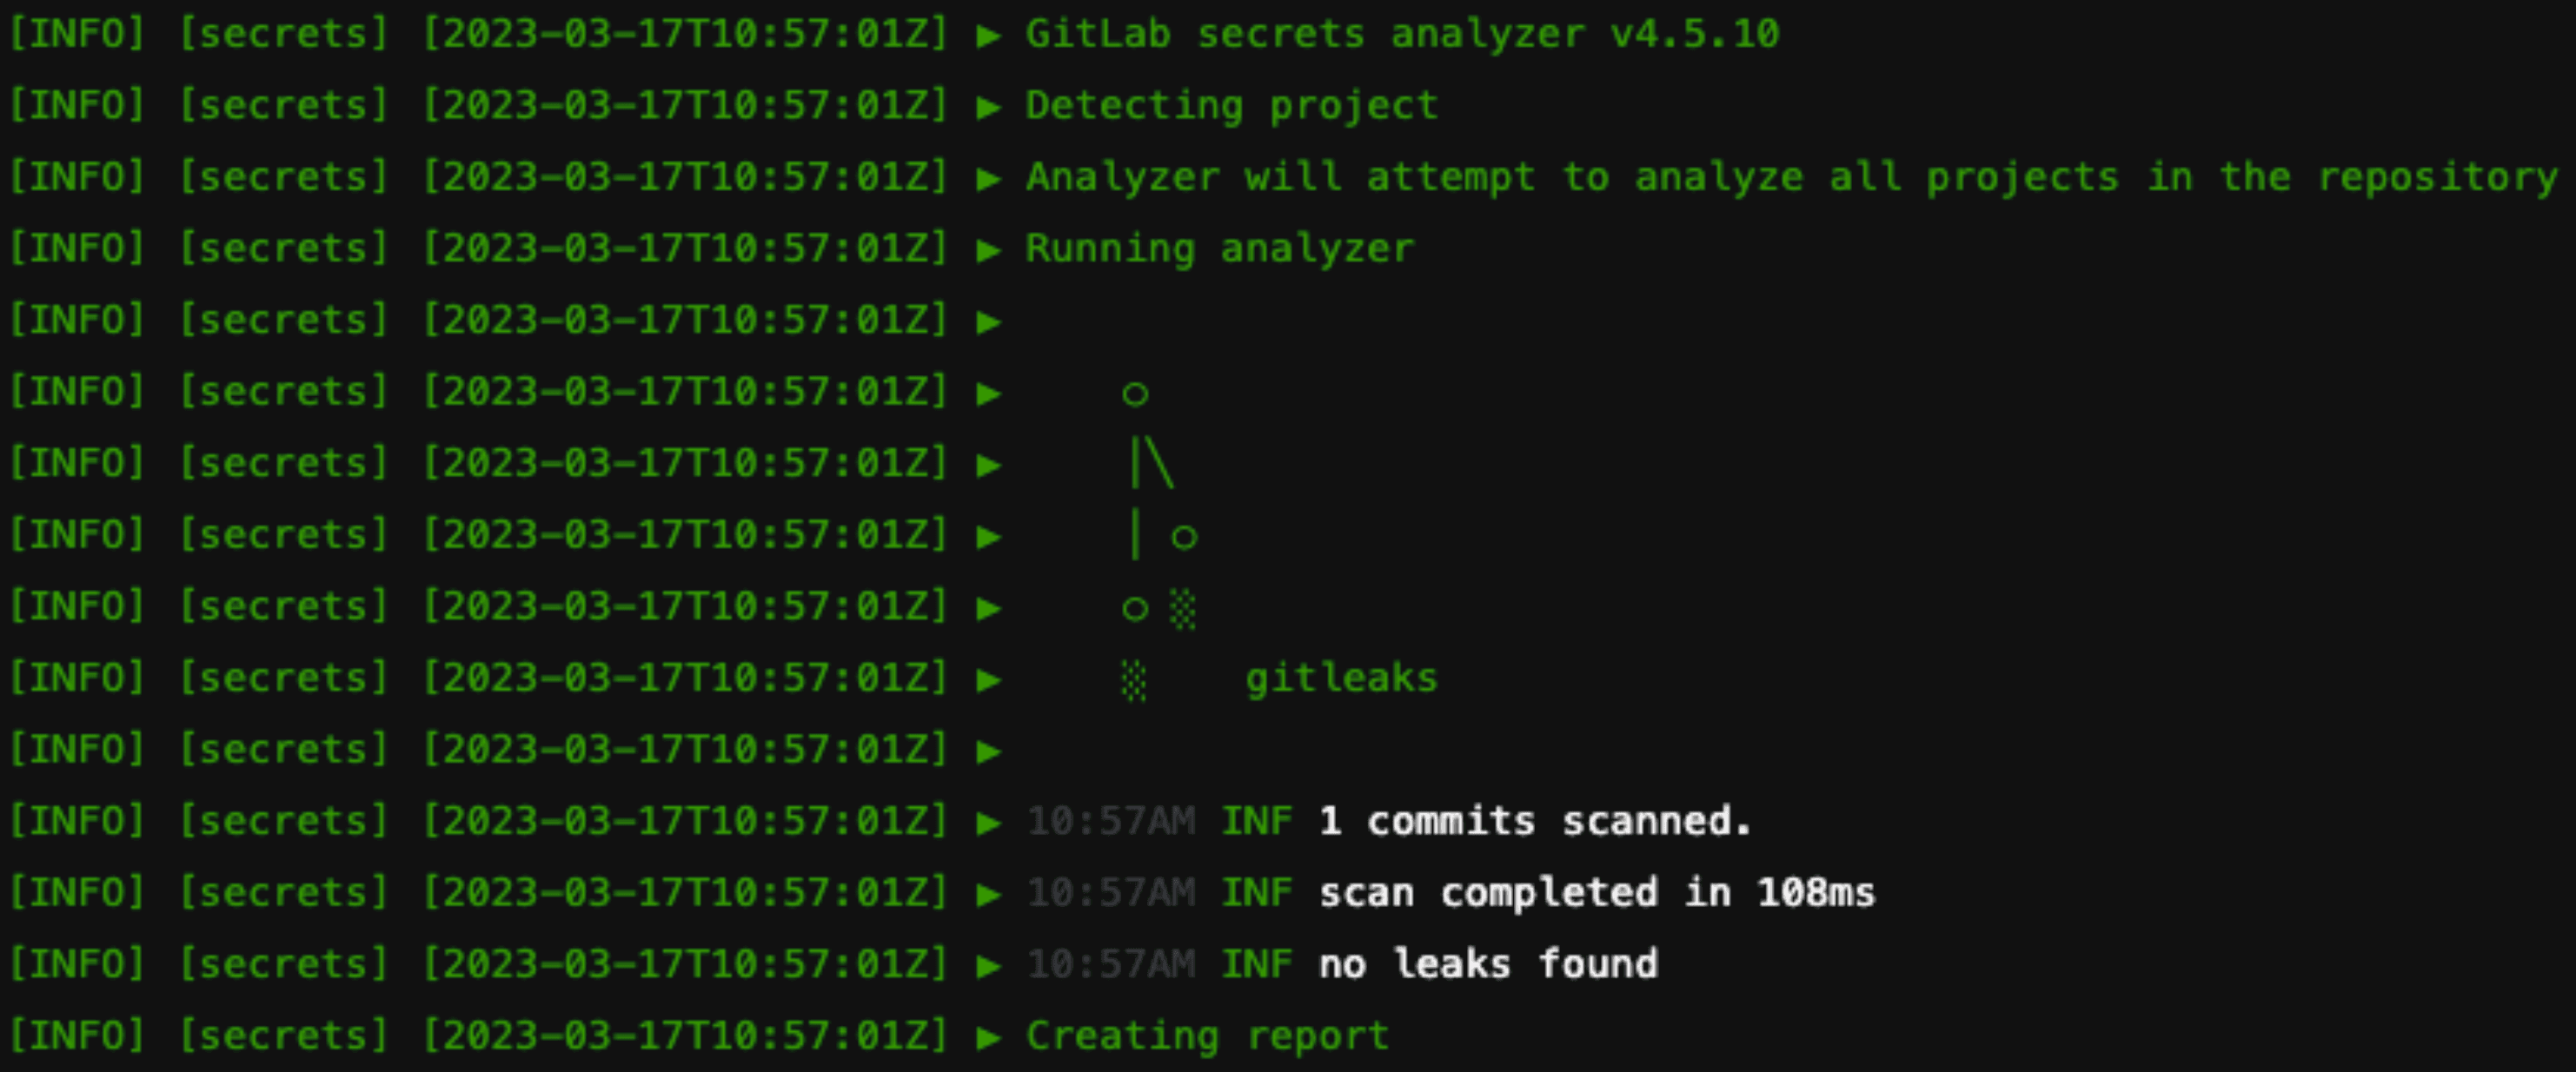 Figure 38: secret_detection Job; Source: Screenshot Terminal Figure 38: secret_detection Job; Source: Screenshot Terminal |
5.2.3 Linting and Testing
| No. | Time | What is being tested? | Result |
|---|---|---|---|
| 3.0 | 14:30 | Linting and testing configurations | ❌ The Readme does not contain information about the use of the linter and Prettier. |
| 3.1 | 14:30 | Githook | All scripts run successfully. 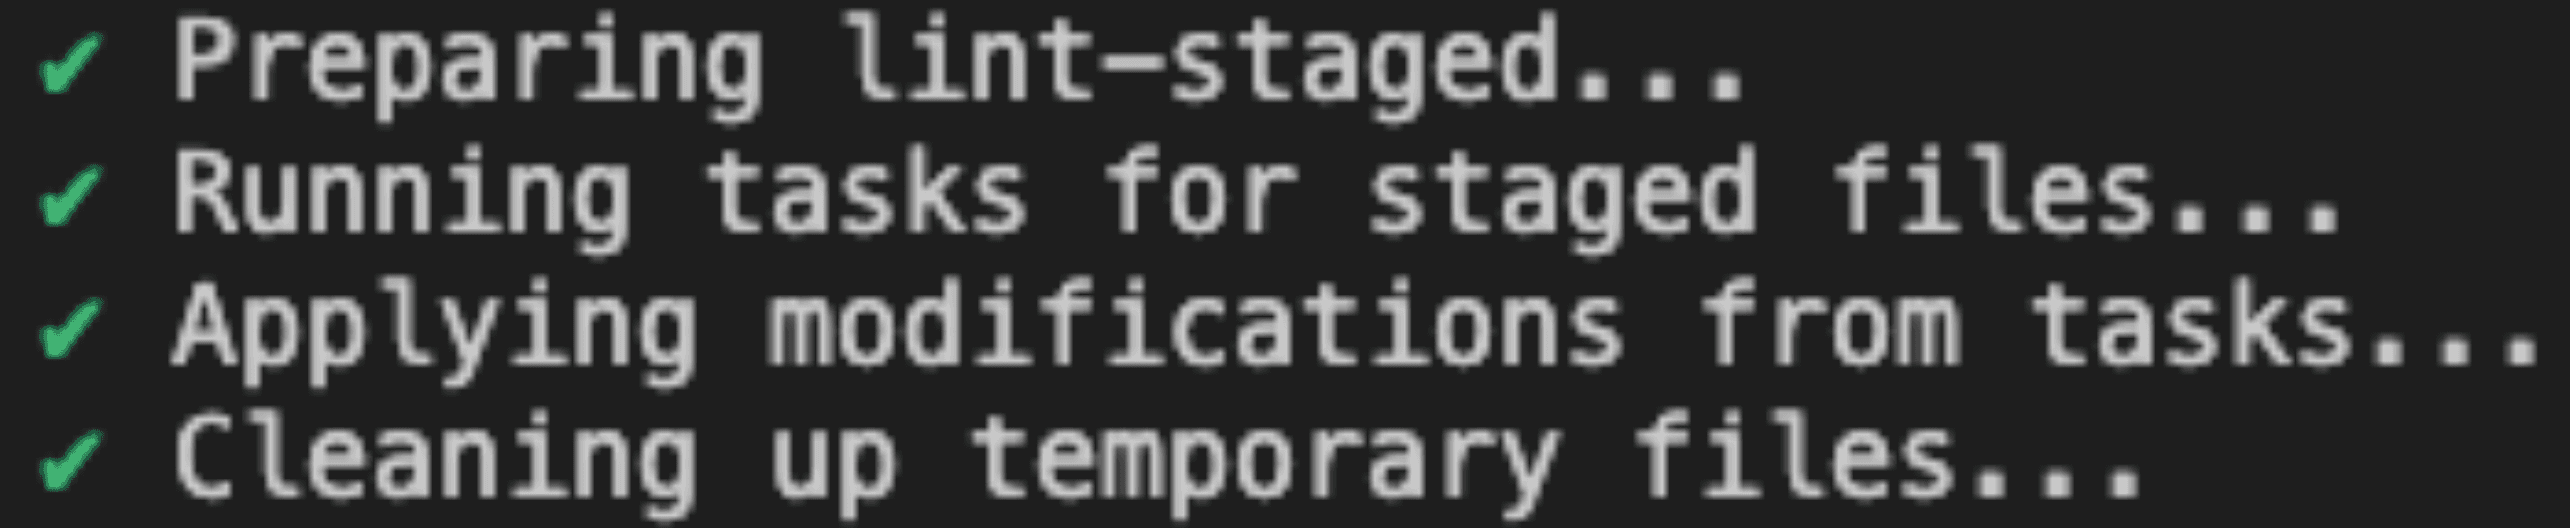 Figure 39: Githook; Source: Screenshot Terminal Figure 39: Githook; Source: Screenshot Terminal |
| 3.2 | 14:30 | Prettier and Linter | The linter runs without errors or warnings. 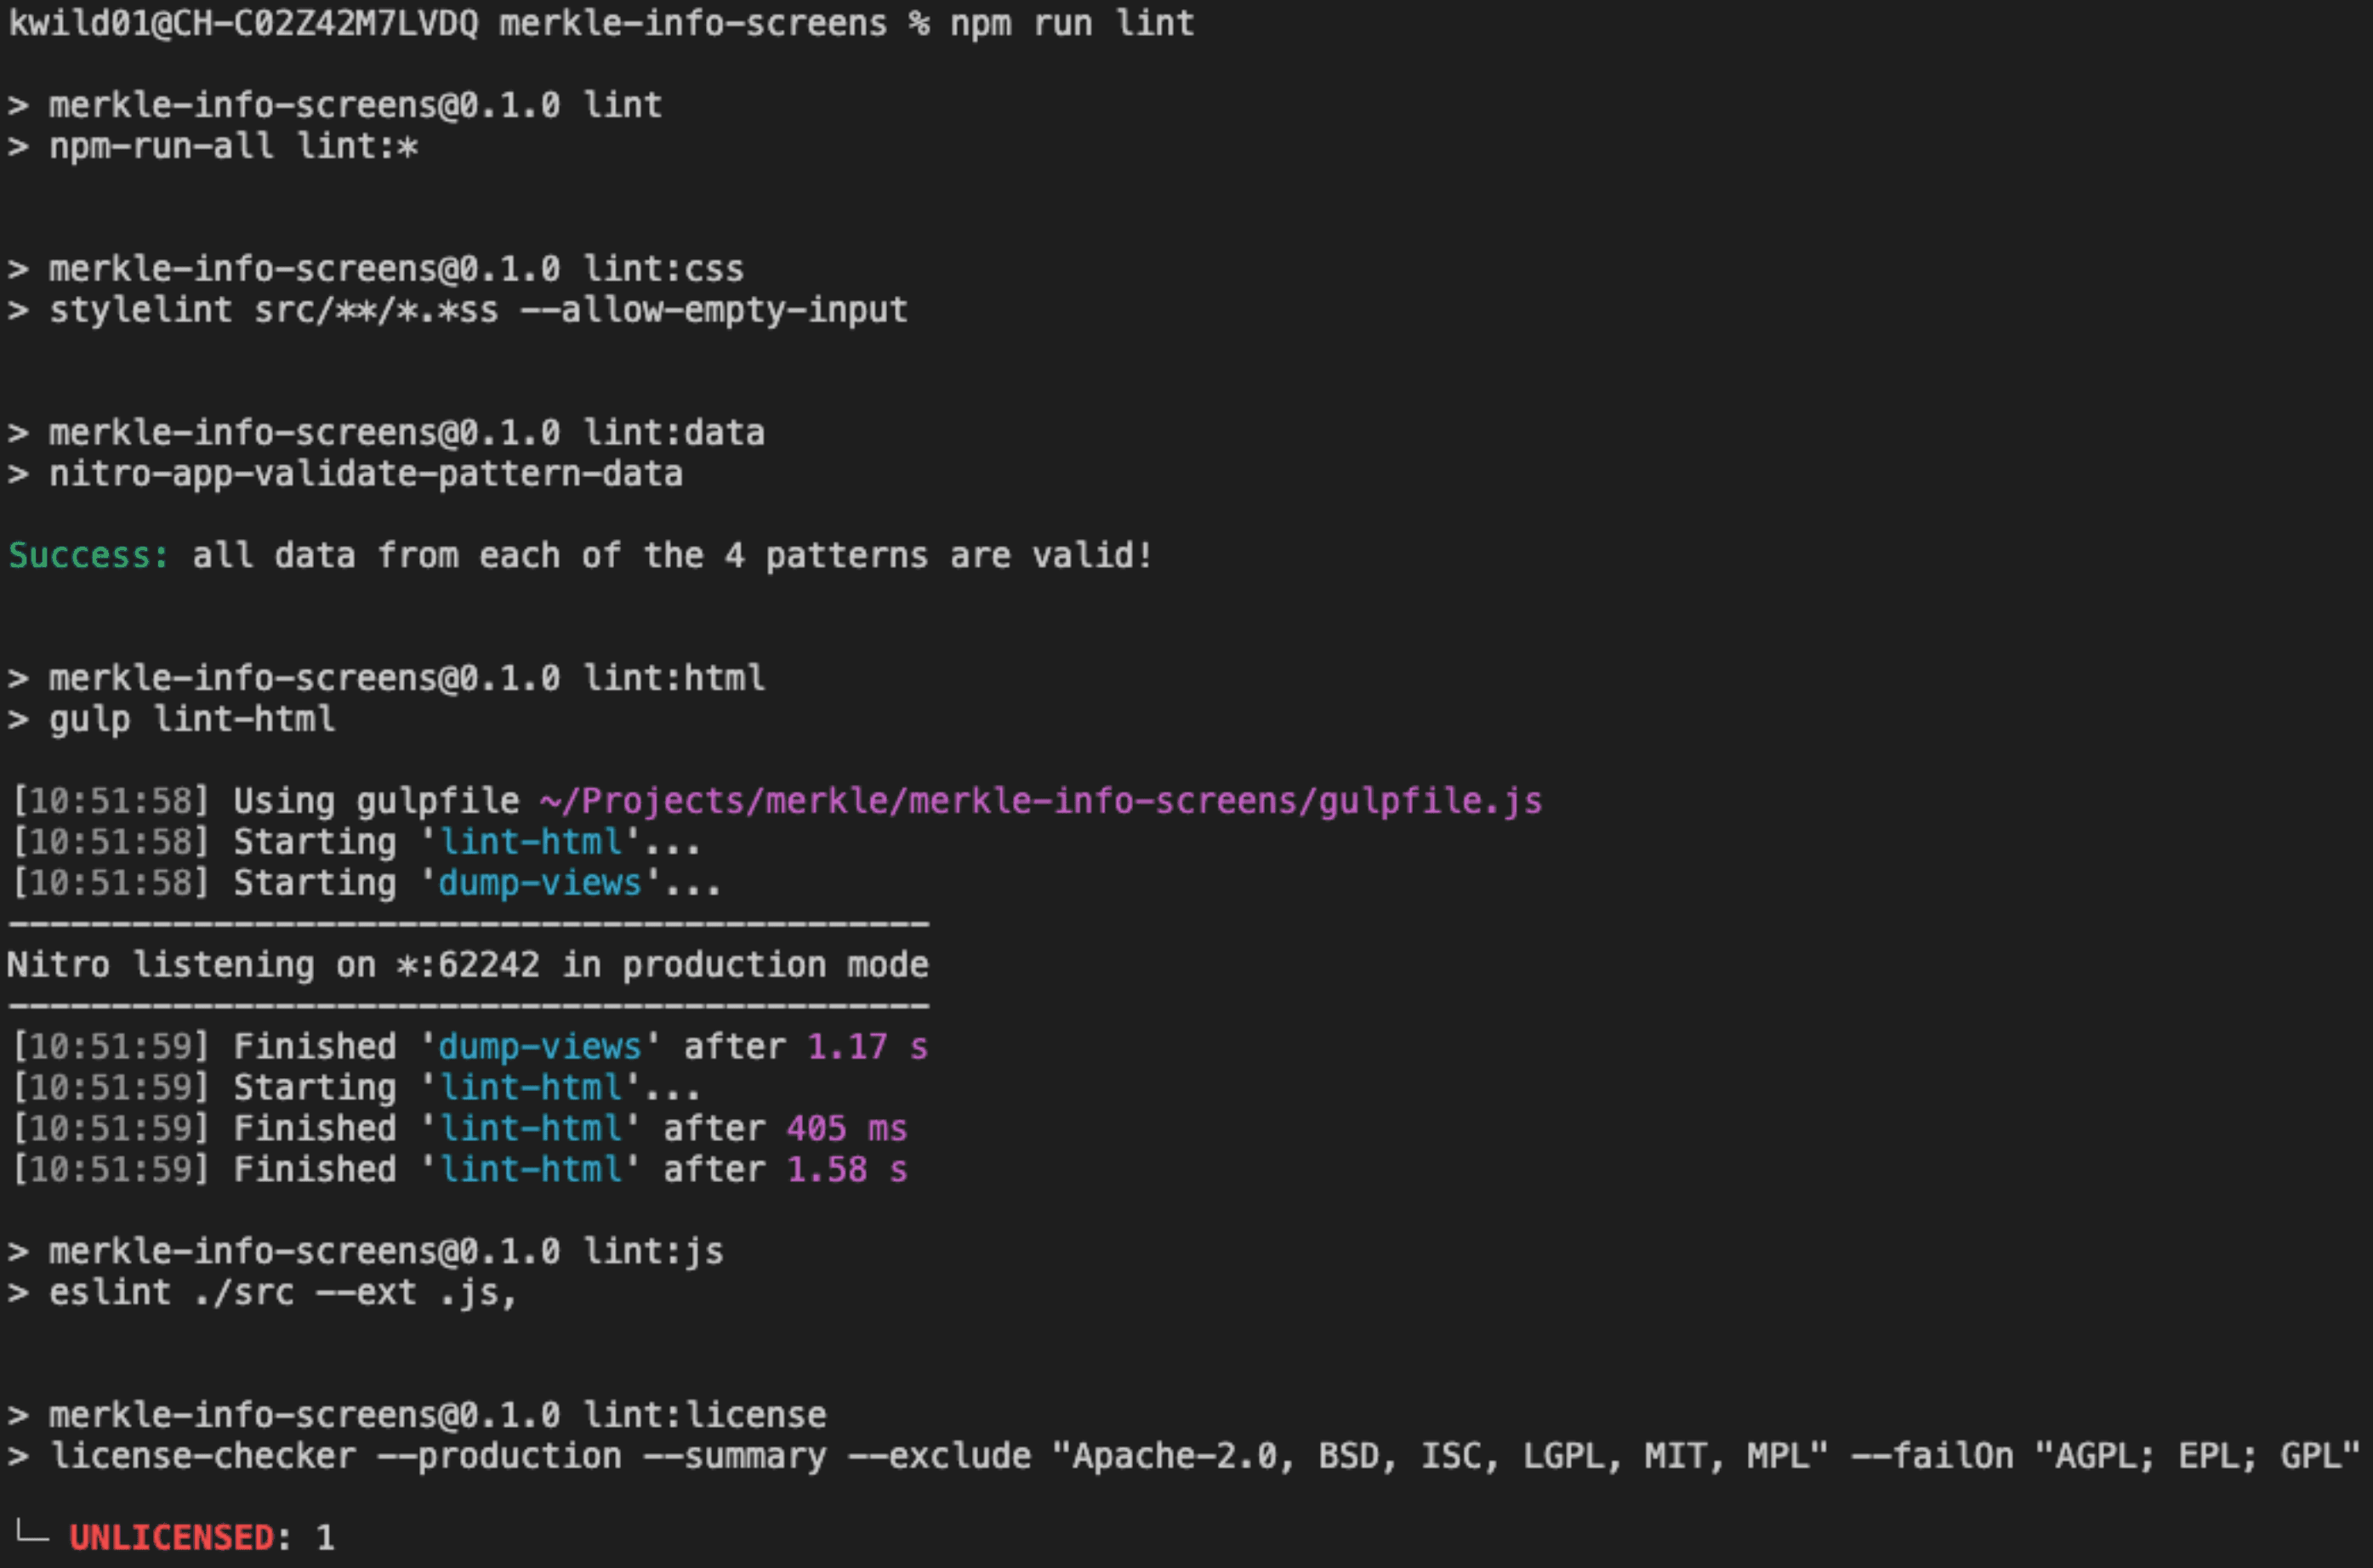 Figure 40: Linting Result; Source: Screenshot Terminal; This snippet shows that Prettier also works without errors. Figure 40: Linting Result; Source: Screenshot Terminal; This snippet shows that Prettier also works without errors. 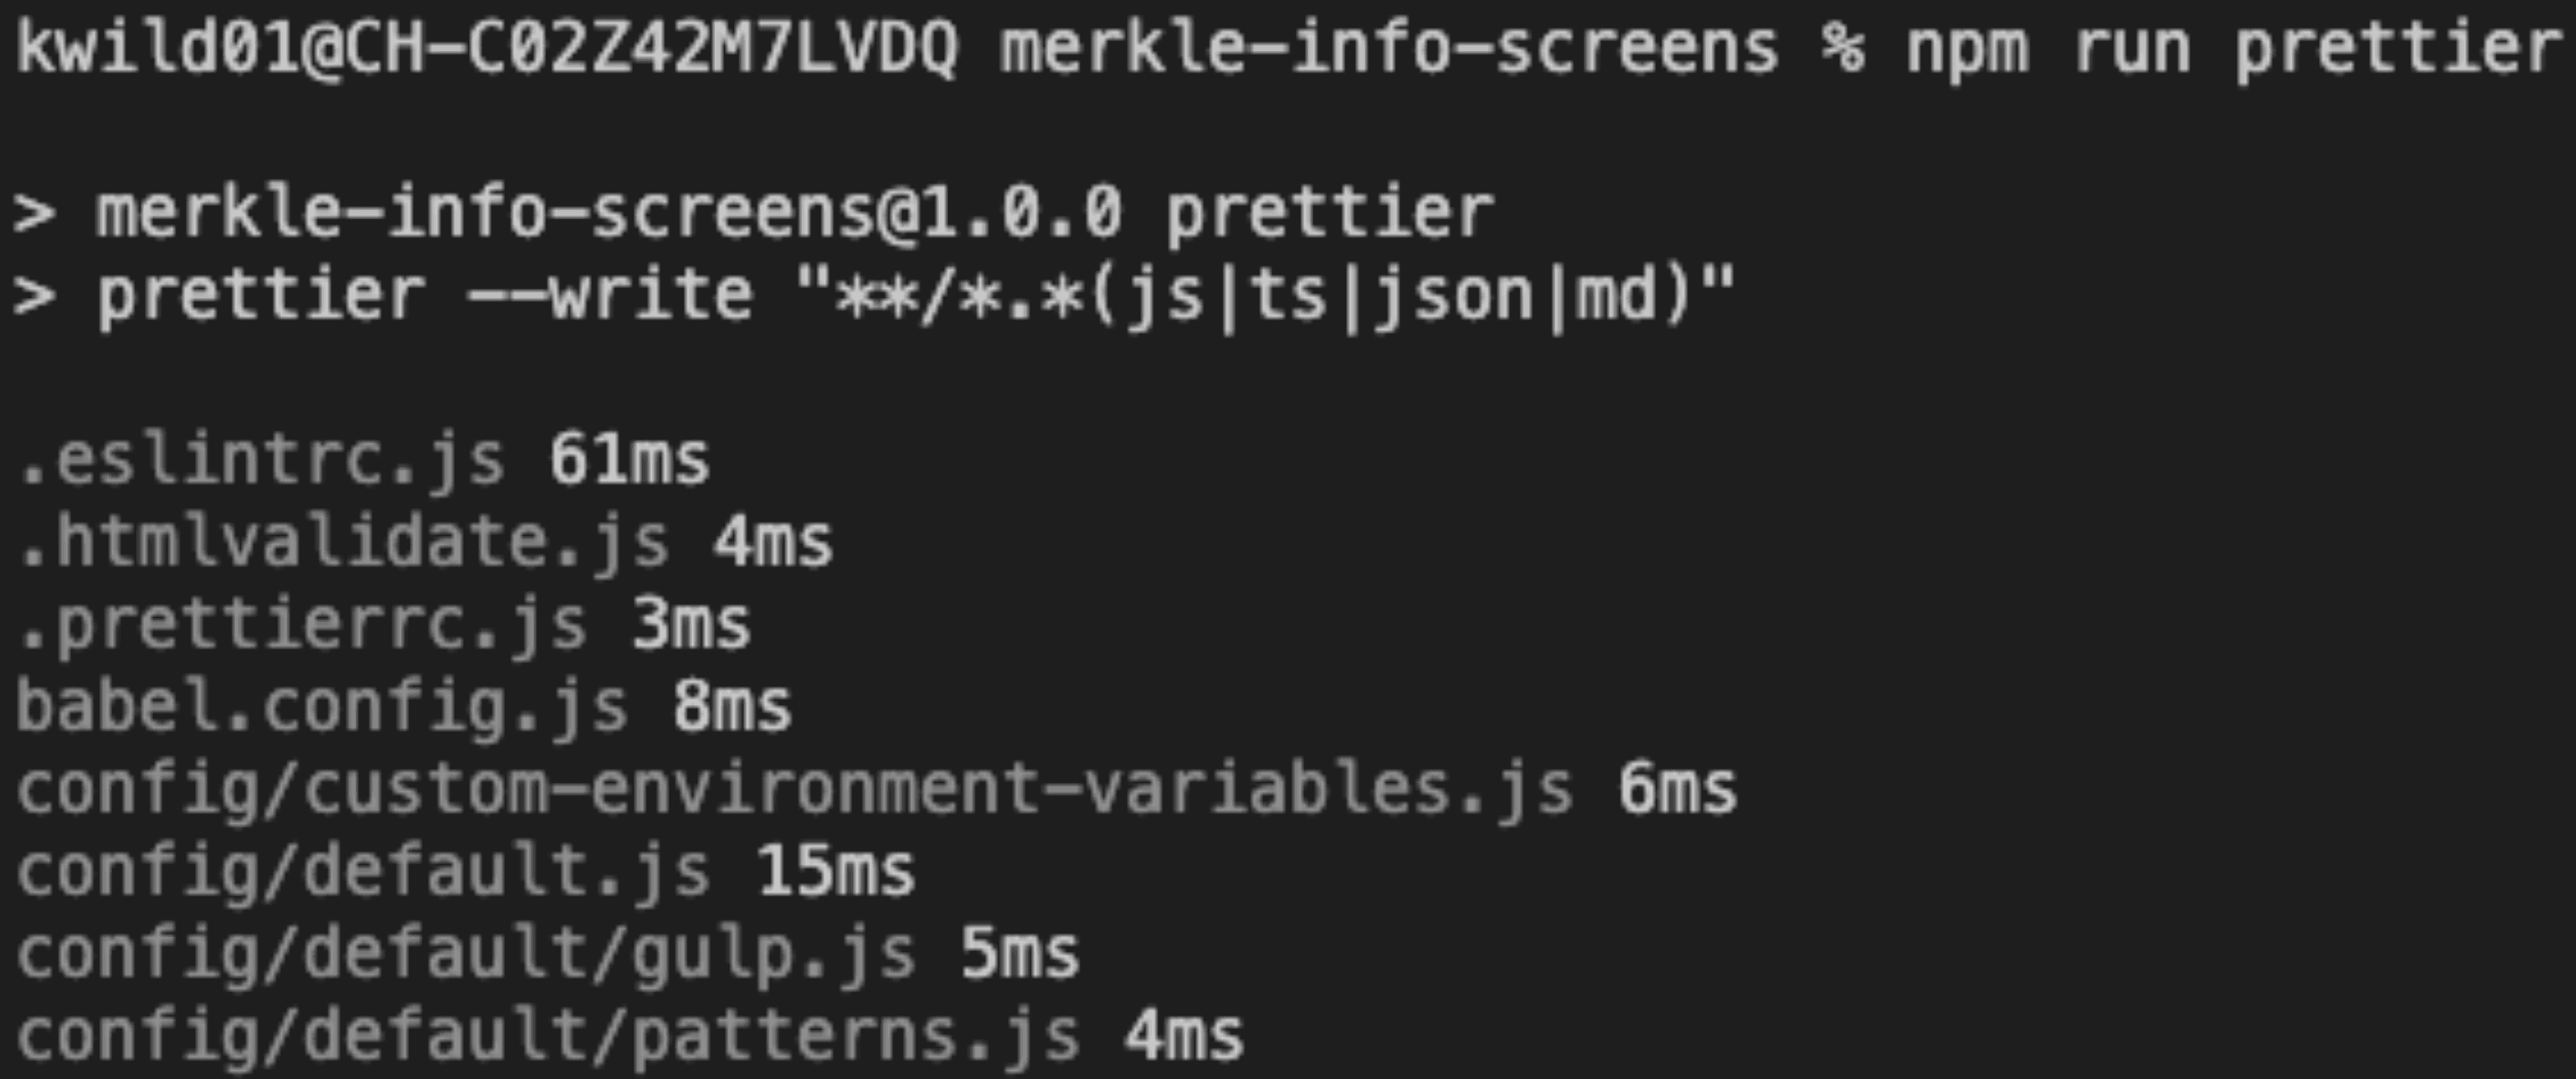 Figure 41: Prettier Result; Source: Screenshot Terminal Figure 41: Prettier Result; Source: Screenshot Terminal |
| 3.3 | 14:30 | CI Pipeline | It is evident on GitLab that the pipeline has been correctly configured since the beginning of the project. 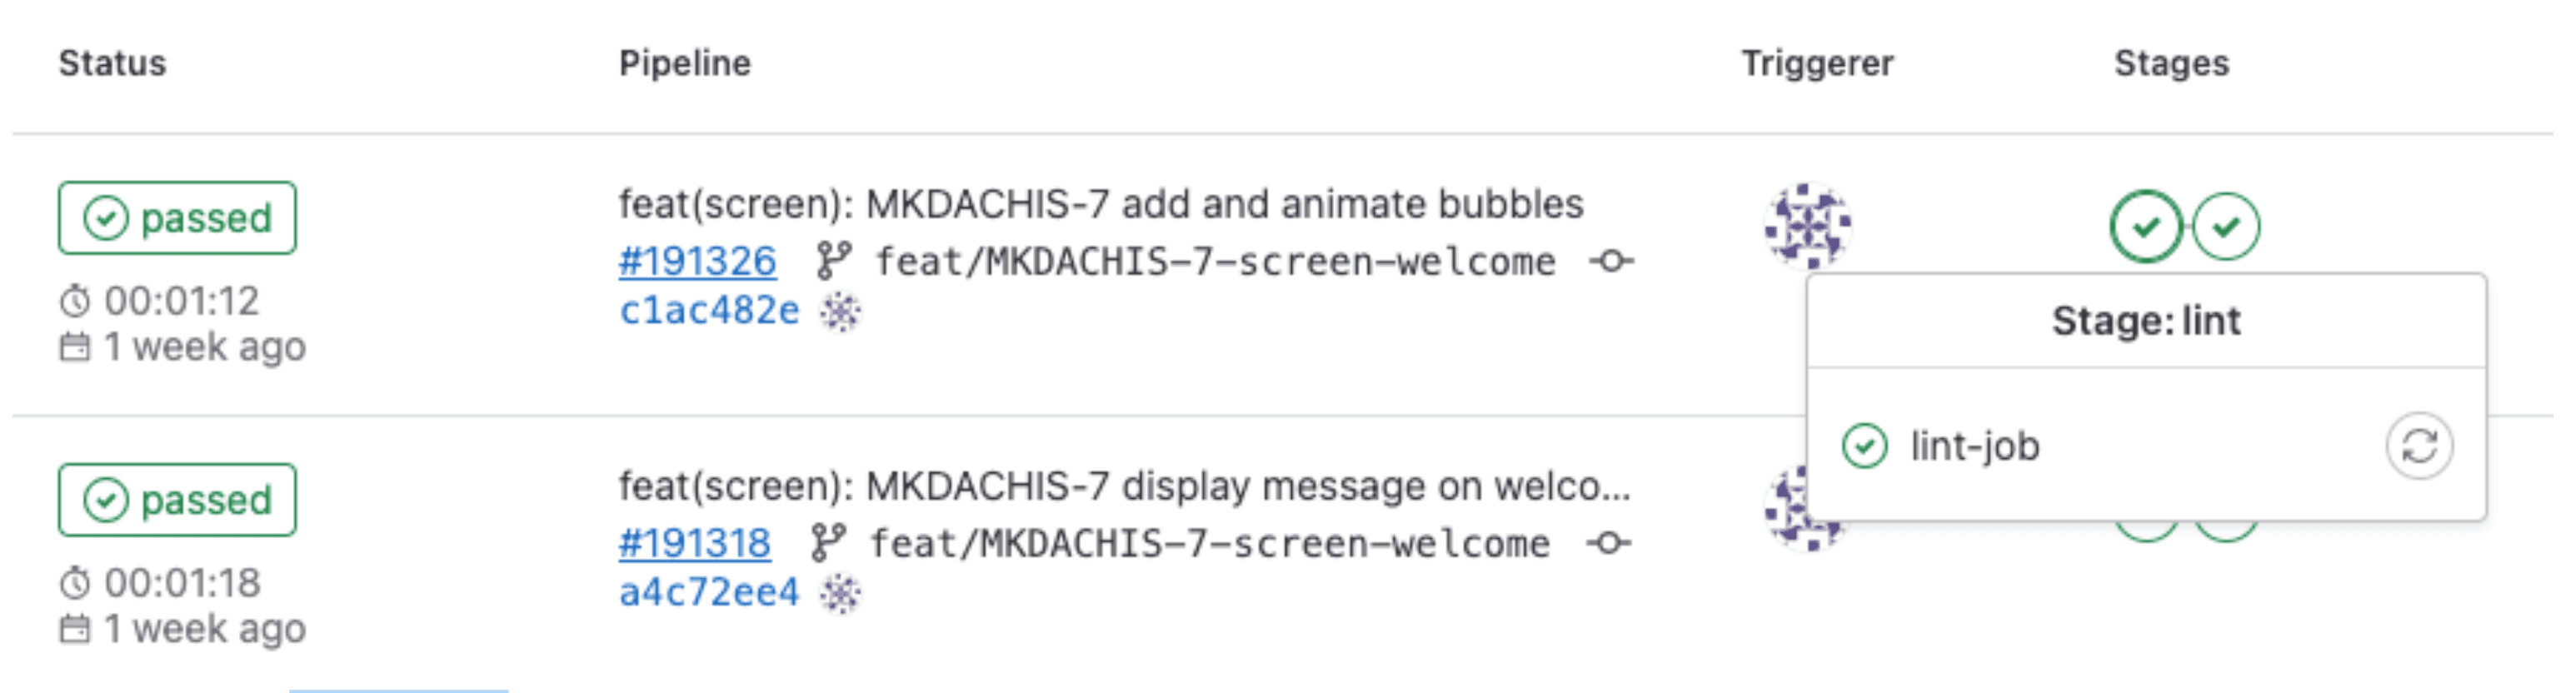 Figure 42: CI Pipeline; Source: Screenshot GitLab Figure 42: CI Pipeline; Source: Screenshot GitLab |
5.2.4 Usability of the Application on a Screen in the Merkle Office St. Gallen
| No. | Time | What is being tested? | Result |
|---|---|---|---|
| 4.0 | 15:00 | Display of floor screen | ❌ The content of the input and weather screens are not positioned correctly. 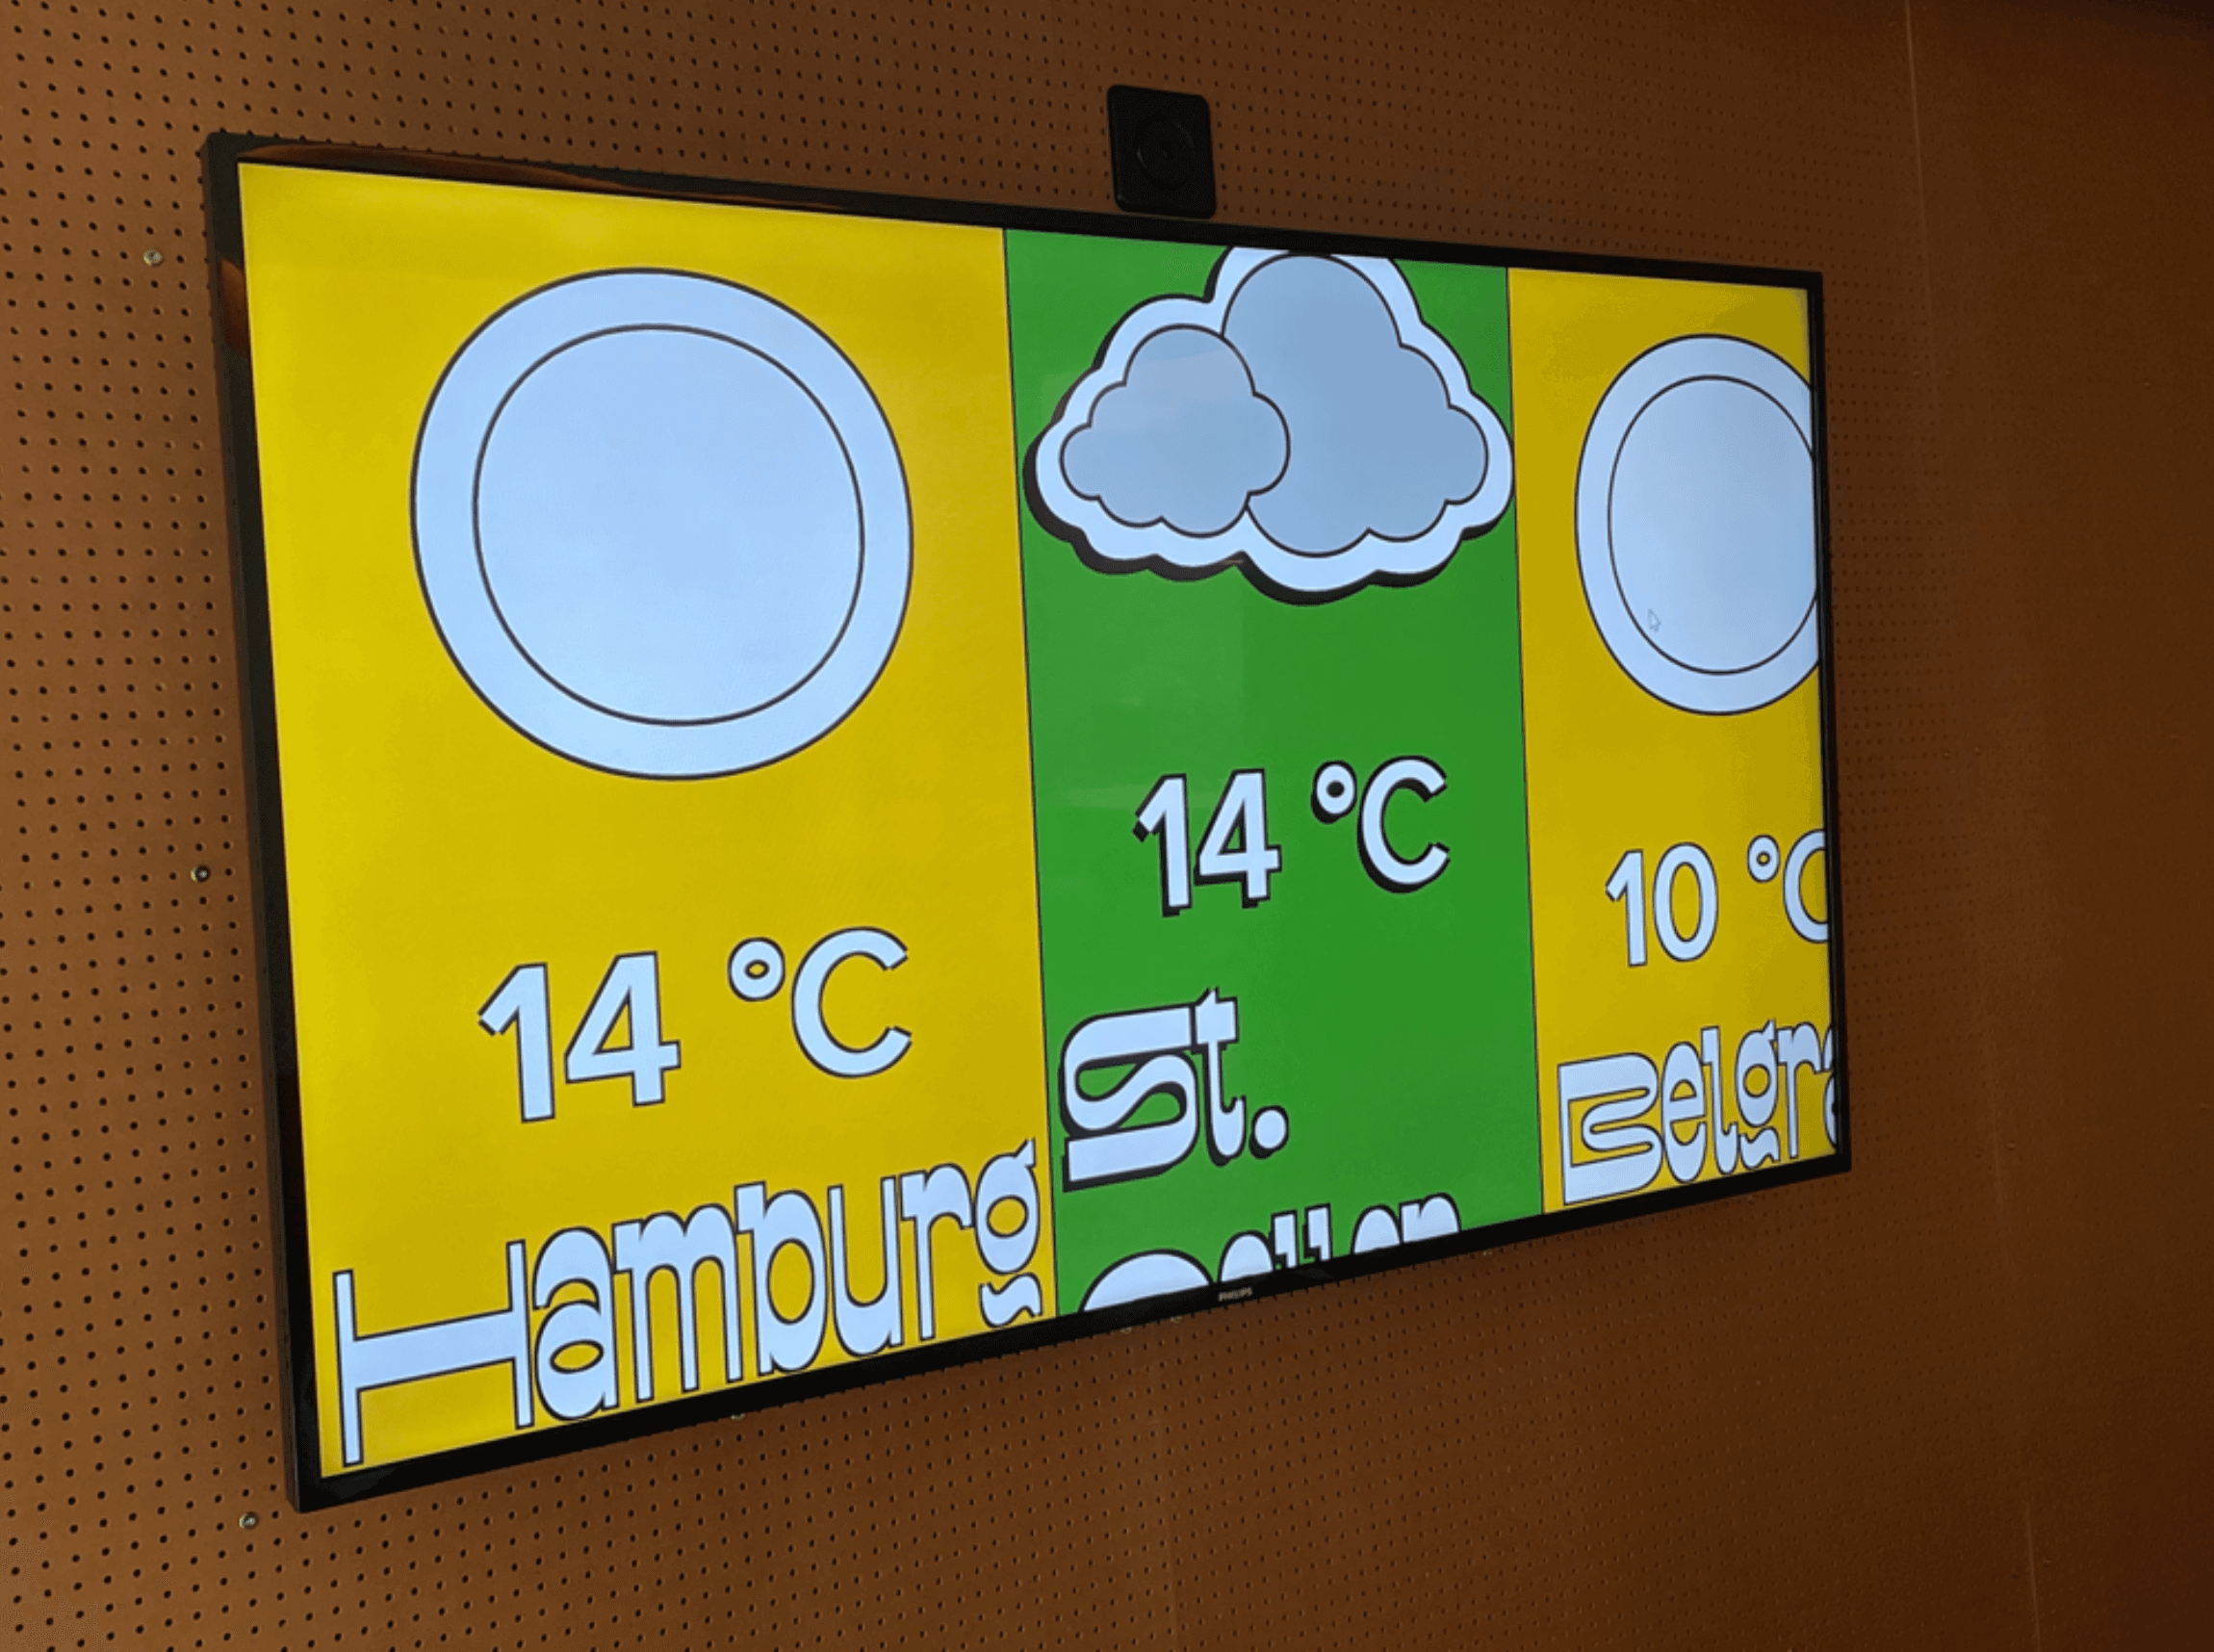 Figure 43: WeatherLocations Screen on Floor Screen; Source: Self-created Figure 43: WeatherLocations Screen on Floor Screen; Source: Self-created |
| 4.1 | 15:00 | Stability | To check stability, two things were done. Observation after one hour: After more than one hour, the content was still displayed attractively and correctly. The application also had no pauses or noticeable stuttering. Profiling over five minutes: In Inspect mode, the application’s performance was recorded over five minutes. The result is as follows: - Blue shows the JS heap. The higher this line rises, the more memory JS requires. Since the graph does not rise indefinitely, but also decreases again, no concerns need to be made about memory. JS quickly releases the resources. - Green represents the DOM nodes. These values are also satisfactory.  Figure 44: Profiling Result; Source: Screenshot Browser Figure 44: Profiling Result; Source: Screenshot Browser |
| 4.2 | 15:30 | Animations | The animations are displayed smoothly. |
| 4.3 | 15:30 | Date and time control | To check time control, three different dates were provided.; 1. ?date=2023-02-20&time=09-30  Figure 45: Welcome Monday Morning; Source: Screenshot Browser; 2. Figure 45: Welcome Monday Morning; Source: Screenshot Browser; 2. ?date=2003-02-12&time=22-14  Figure 46: Welcome Wednesday Evening; Source: Screenshot Browser; 3. Figure 46: Welcome Wednesday Evening; Source: Screenshot Browser; 3. ?date=2023-02-10&time=12-14  Figure 47: Welcome Friday Noon; Source: Screenshot Browser; The screenshots show that all were correctly processed. Figure 47: Welcome Friday Noon; Source: Screenshot Browser; The screenshots show that all were correctly processed. |
| 4.4 | 15:30 | Transitions | The transitions look appealing. |
| 4.5 | 15:30 | Outsourcing animation duration | It was found that all animations are identical. The location in the code where the duration of the transitions can be changed was quickly discovered. It turned out that this line affects all screens.  Figure 48: Animation Duration in Screen Class; Source: Screenshot VSC Figure 48: Animation Duration in Screen Class; Source: Screenshot VSC |
5.2.5 Screen Welcome and Input
| No. | Time | What is being tested? | Result |
|---|---|---|---|
| 5.0 | 16:00 | Storage of content and rules | All data is stored in a central location and is also well-structured. 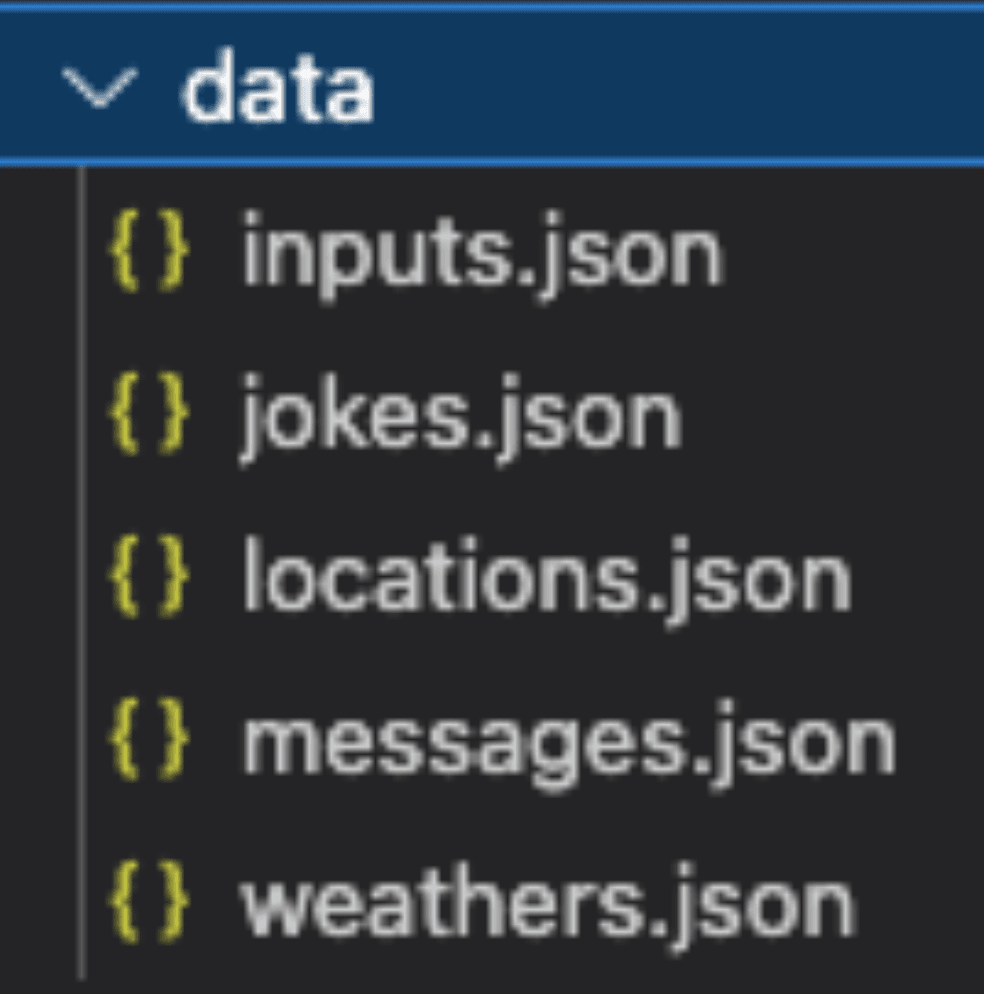 Figure 49: JSON Data; Source: Screenshot VSC Figure 49: JSON Data; Source: Screenshot VSC |
| 5.1 | 16:00 | Animations | ⚠️ All design specifications were implemented. However, the bubbles could still be improved. They spread across the entire screen after some time. |
| 5.2 | 16:00 | Rule compliance | Since testing was done in the afternoon, the displayed input was correct.  Figure 50: Input Screen Afternoon; Source: Self-created; In addition, it was also checked if these contents change correctly with a URL query parameter. This is also the case. Figure 50: Input Screen Afternoon; Source: Self-created; In addition, it was also checked if these contents change correctly with a URL query parameter. This is also the case. |
| 5.3 | 16:00 | Font | ❌ The fonts have the specified font types and are centered. However, the border occasionally does not look perfect. |
| 5.4 | 16:00 | Display of text on Welcome Screen | No matter how long the text or how small the window is, it remains legible.  Figure 51: Welcome Text on iPad Air Size; Source: Screenshot Browser Figure 51: Welcome Text on iPad Air Size; Source: Screenshot Browser |
| 5.5 | 16:00 | Display of text on Input Screen | ❌ For some extremely long texts, the result is not yet satisfactory.  Figure 52: Long Input; Source: Screenshot Browser Figure 52: Long Input; Source: Screenshot Browser |
5.2.6 Screen Joke
| No. | Time | What is being tested? | Result |
|---|---|---|---|
| 6.0 | 16:00 | Storage of content | The data is well-structured and stored in a JSON file. |
| 6.1 | 16:00 | Display of text | Even long jokes can be fully displayed.  Figure 53: Long Joke; Source: Screenshot Browser Figure 53: Long Joke; Source: Screenshot Browser |
| 6.2 | 16:30 | Animation | The question pulses twice and is then hidden. Afterward, a punchline appears, which pulses once. |
| 6.3 | 16:30 | Pulsing | The question pulses twice and is then hidden. Afterward, a punchline appears, which pulses once. |
| 6.4 | 16:30 | This test was removed as Test 1.4 has already checked this. | |
| 6.5 | 16:30 | Configurability | Two variables are available to adjust the two durations.  Figure 54: Joke Durations; Source: Screenshot VSC; This is also described in the Readme. Figure 54: Joke Durations; Source: Screenshot VSC; This is also described in the Readme.  Figure 55: Joke Snippet in Readme; Source: Screenshot VSC Figure 55: Joke Snippet in Readme; Source: Screenshot VSC |
5.2.6 Screen WeatherLocations
| No. | Time | What is being tested? | Result |
|---|---|---|---|
| 7.0 | 16:30 | Animation | As specified, the screen is correctly built and removed. |
| 7.1 | 16:30 | Location selection | Upon inspection, it appeared that the locations were completely random. Even when calling the Location Route under /api/locations, no patterns were discovered in the responses.  Figure 56: Response Snippet from Locations Route; Source: Screenshot Browser Figure 56: Response Snippet from Locations Route; Source: Screenshot Browser |
| 7.2 | 16:30 | Display of weather data | The temperatures are correct and are always rounded to whole numbers. |
| 7.3 | 16:30 | Data caching | After each location was displayed, Wi-Fi was disabled. The data could still be displayed afterward, so the caching works. |
| 7.4 | 16:30 | Color focus | ⚠️ The outlines of three pixels are displayed, and the focus is shifted according to the specification. The animation could be made even smoother with a transition when the image changes. |
| 7.5 | 16:30 | Error handling | When no internet was available from the start, the screen was not visible. After enabling Wi-Fi, the weather was displayed again. |
5.3 Test Evaluation
Out of the 35 test results, 29 met the expectations. Four tests failed. For another two, there is still room for improvement.
To ensure the application meets the requirements, the four issues should be addressed with the highest priority. If there is still time for improvements afterward, it would be nice if they could also be implemented.
 Figure 57: Test Evaluation
Source: Self-created in Excel
Overall, I am satisfied with the result. However, I am still somewhat surprised that six things are not yet optimal.
5.4 Improvements
Below, I describe how the issues were fixed.
5.4.1 Configurations for Linting and Testing - 3.0
The linting and testing scripts were configured, but there was nothing written on how to use them. Therefore, a brief text was added to the README.
5.4.2 Display of Floor Screen - 4.0
First, the question had to be clarified whether there would be enough time for this improvement and how important it is for the application.
The easiest way would be to never close the laptop, but that would defeat the purpose of this project. Therefore, it was decided that this issue must be addressed.
Due to the standard HD resolution of the floor screens, the weather screen was not displaying correctly. This was caused by long location labels. These enlarged the boxes. To fix the problem, three actions were taken:
- The overflow of the container in which the weather is displayed was set to
hidden. - The text was given a maximum width of 90%.
- The
white-spaceof the text was set tonowrapto ensure the text remains on one line.
Afterward, almost all absolute pixel values were replaced by relative units like em, %, vw, or vh for safety.
From this error, I learned that in frontend development, it’s essential to cover as many cases as possible.
5.4.3 Animations - 5.1
The bubbles in the welcome screen are moved on the screen in a function that is called once per second. Even after the screen ends, the bubbles continue to be animated, which is not optimal for performance.
For this reason, a line of code was added to stop the interval:
clearInterval(this.moveBubblesInterval);
5.4.4 Font - 5.3
The text shadow was improved by setting it with em, relative to the font size, instead of using pixels. This way, it only needs to be defined once and can be used by all fonts, regardless of their sizes.
5.4.5 Display of Text on Input Screen - 5.5
To avoid needing vendor prefixes, display: -webkit-box; was replaced with flex in the input screen during refactoring. However, tests showed that this did not work.
As a result, this value was changed back to -webkit-box.
To ensure the linter does not flag this, Stylelint was disabled for this line:
// stylelint-disable-next-line value-no-vendor-prefix
5.4.6 Color Focus - 7.4
Due to time constraints, it was decided that the image transition would not be animated. However, there are three possible solutions:
- Embed the icon as the background image of a div. This way, a transition on the source can be defined.
- Add both icons to the HTML. The colorless icon will be hidden with a transition, and the active icon will be displayed slowly.
- Only the colored image will be embedded. The color will be removed using a CSS filter and later slowly reintroduced.
A ticket for this improvement was created.
5.5 Test Execution 2
After the improvements were made, their functionality had to be ensured.
Date: 20.03.2023
Person: Kay Wild
| Nr. | Zeitpunkt | Was wird getestet? | Ergebnis |
|---|---|---|---|
| 3.0 | 8:30 | Configuration for Linting and Testing | The README now includes instructions on how to run the linter and Prettier. 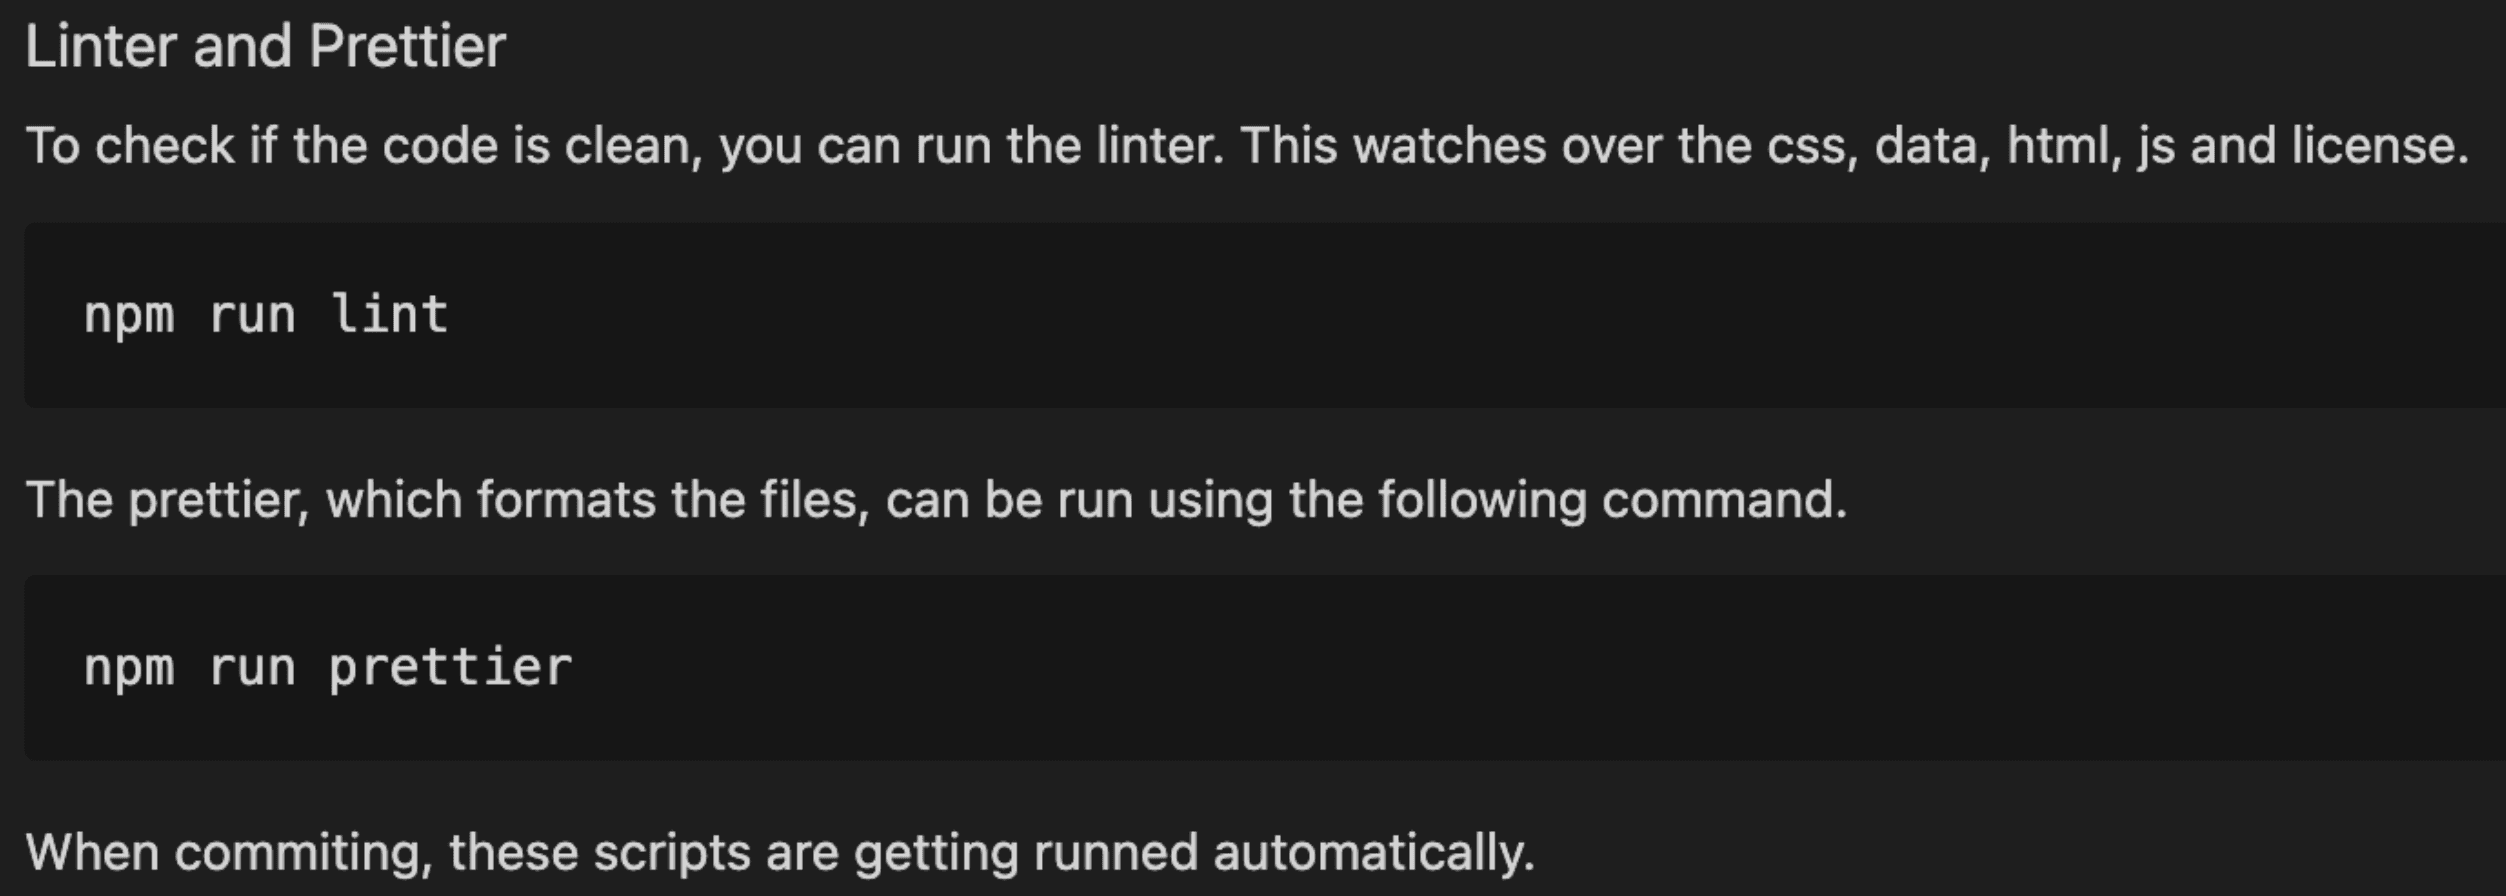 Figure 58: Linter and Prettier Description; Source: Screenshot VSC Figure 58: Linter and Prettier Description; Source: Screenshot VSC |
| 4.0 | 8:30 | Display of Floor Screen | All screens are displayed correctly. 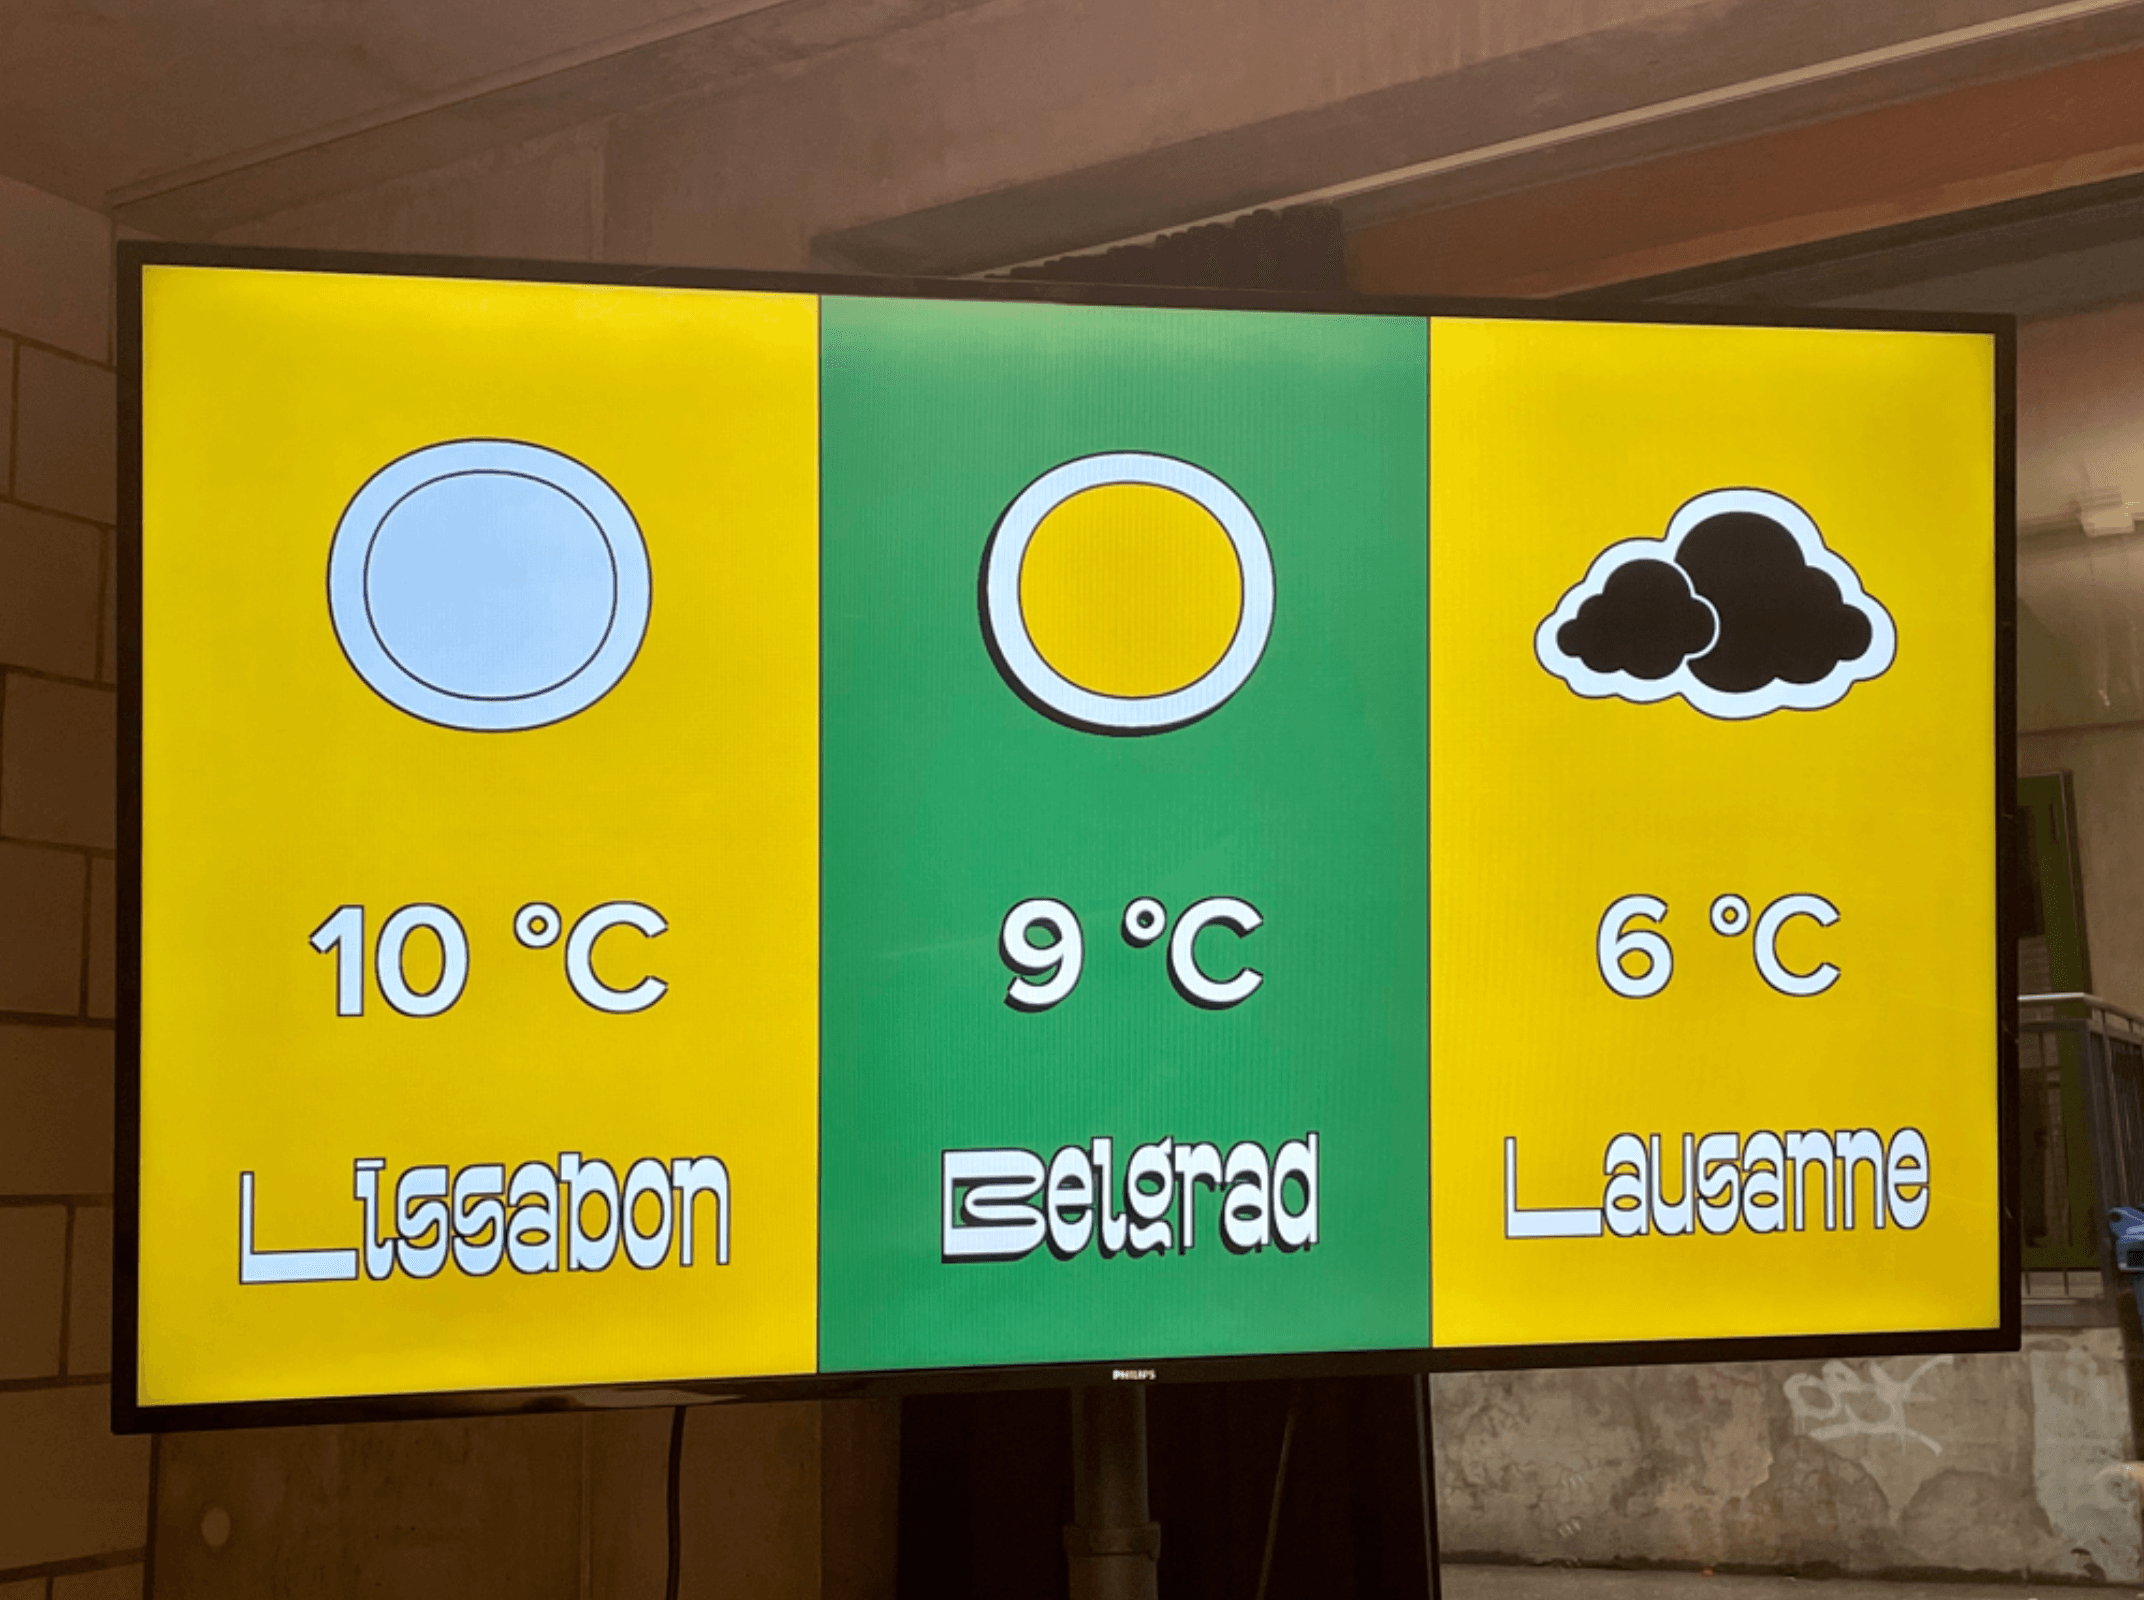 Figure 59: Correct Display of Weather Screen; Source: Self-created Figure 59: Correct Display of Weather Screen; Source: Self-created |
| 5.1 | 8:30 | Animations | To ensure the circles stop moving after stopping, two console outputs were added. The text “In moveBubbles function” is printed every time the function that moves the bubbles is called. In the browser console, it is evident that the function is no longer used after twelve calls.  Figure 60: Welcome Browser Console; Source: Screenshot Browser Figure 60: Welcome Browser Console; Source: Screenshot Browser |
| 5.3 | 8:30 | Font | The text shadow is now set relative to the font size instead of in pixels. The text looks appealing on all screens. 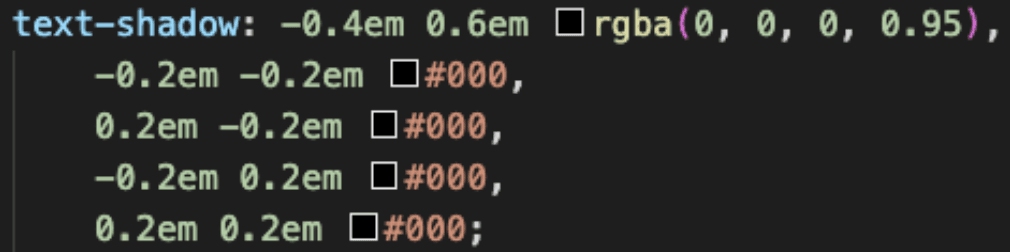 Figure 61: Updated Text Shadow; Source: Screenshot VSC Figure 61: Updated Text Shadow; Source: Screenshot VSC |
| 5.5 | 8:30 | Display of Text on Input Screen | The text now runs over a maximum of three lines and is truncated with ellipses if it is too long. 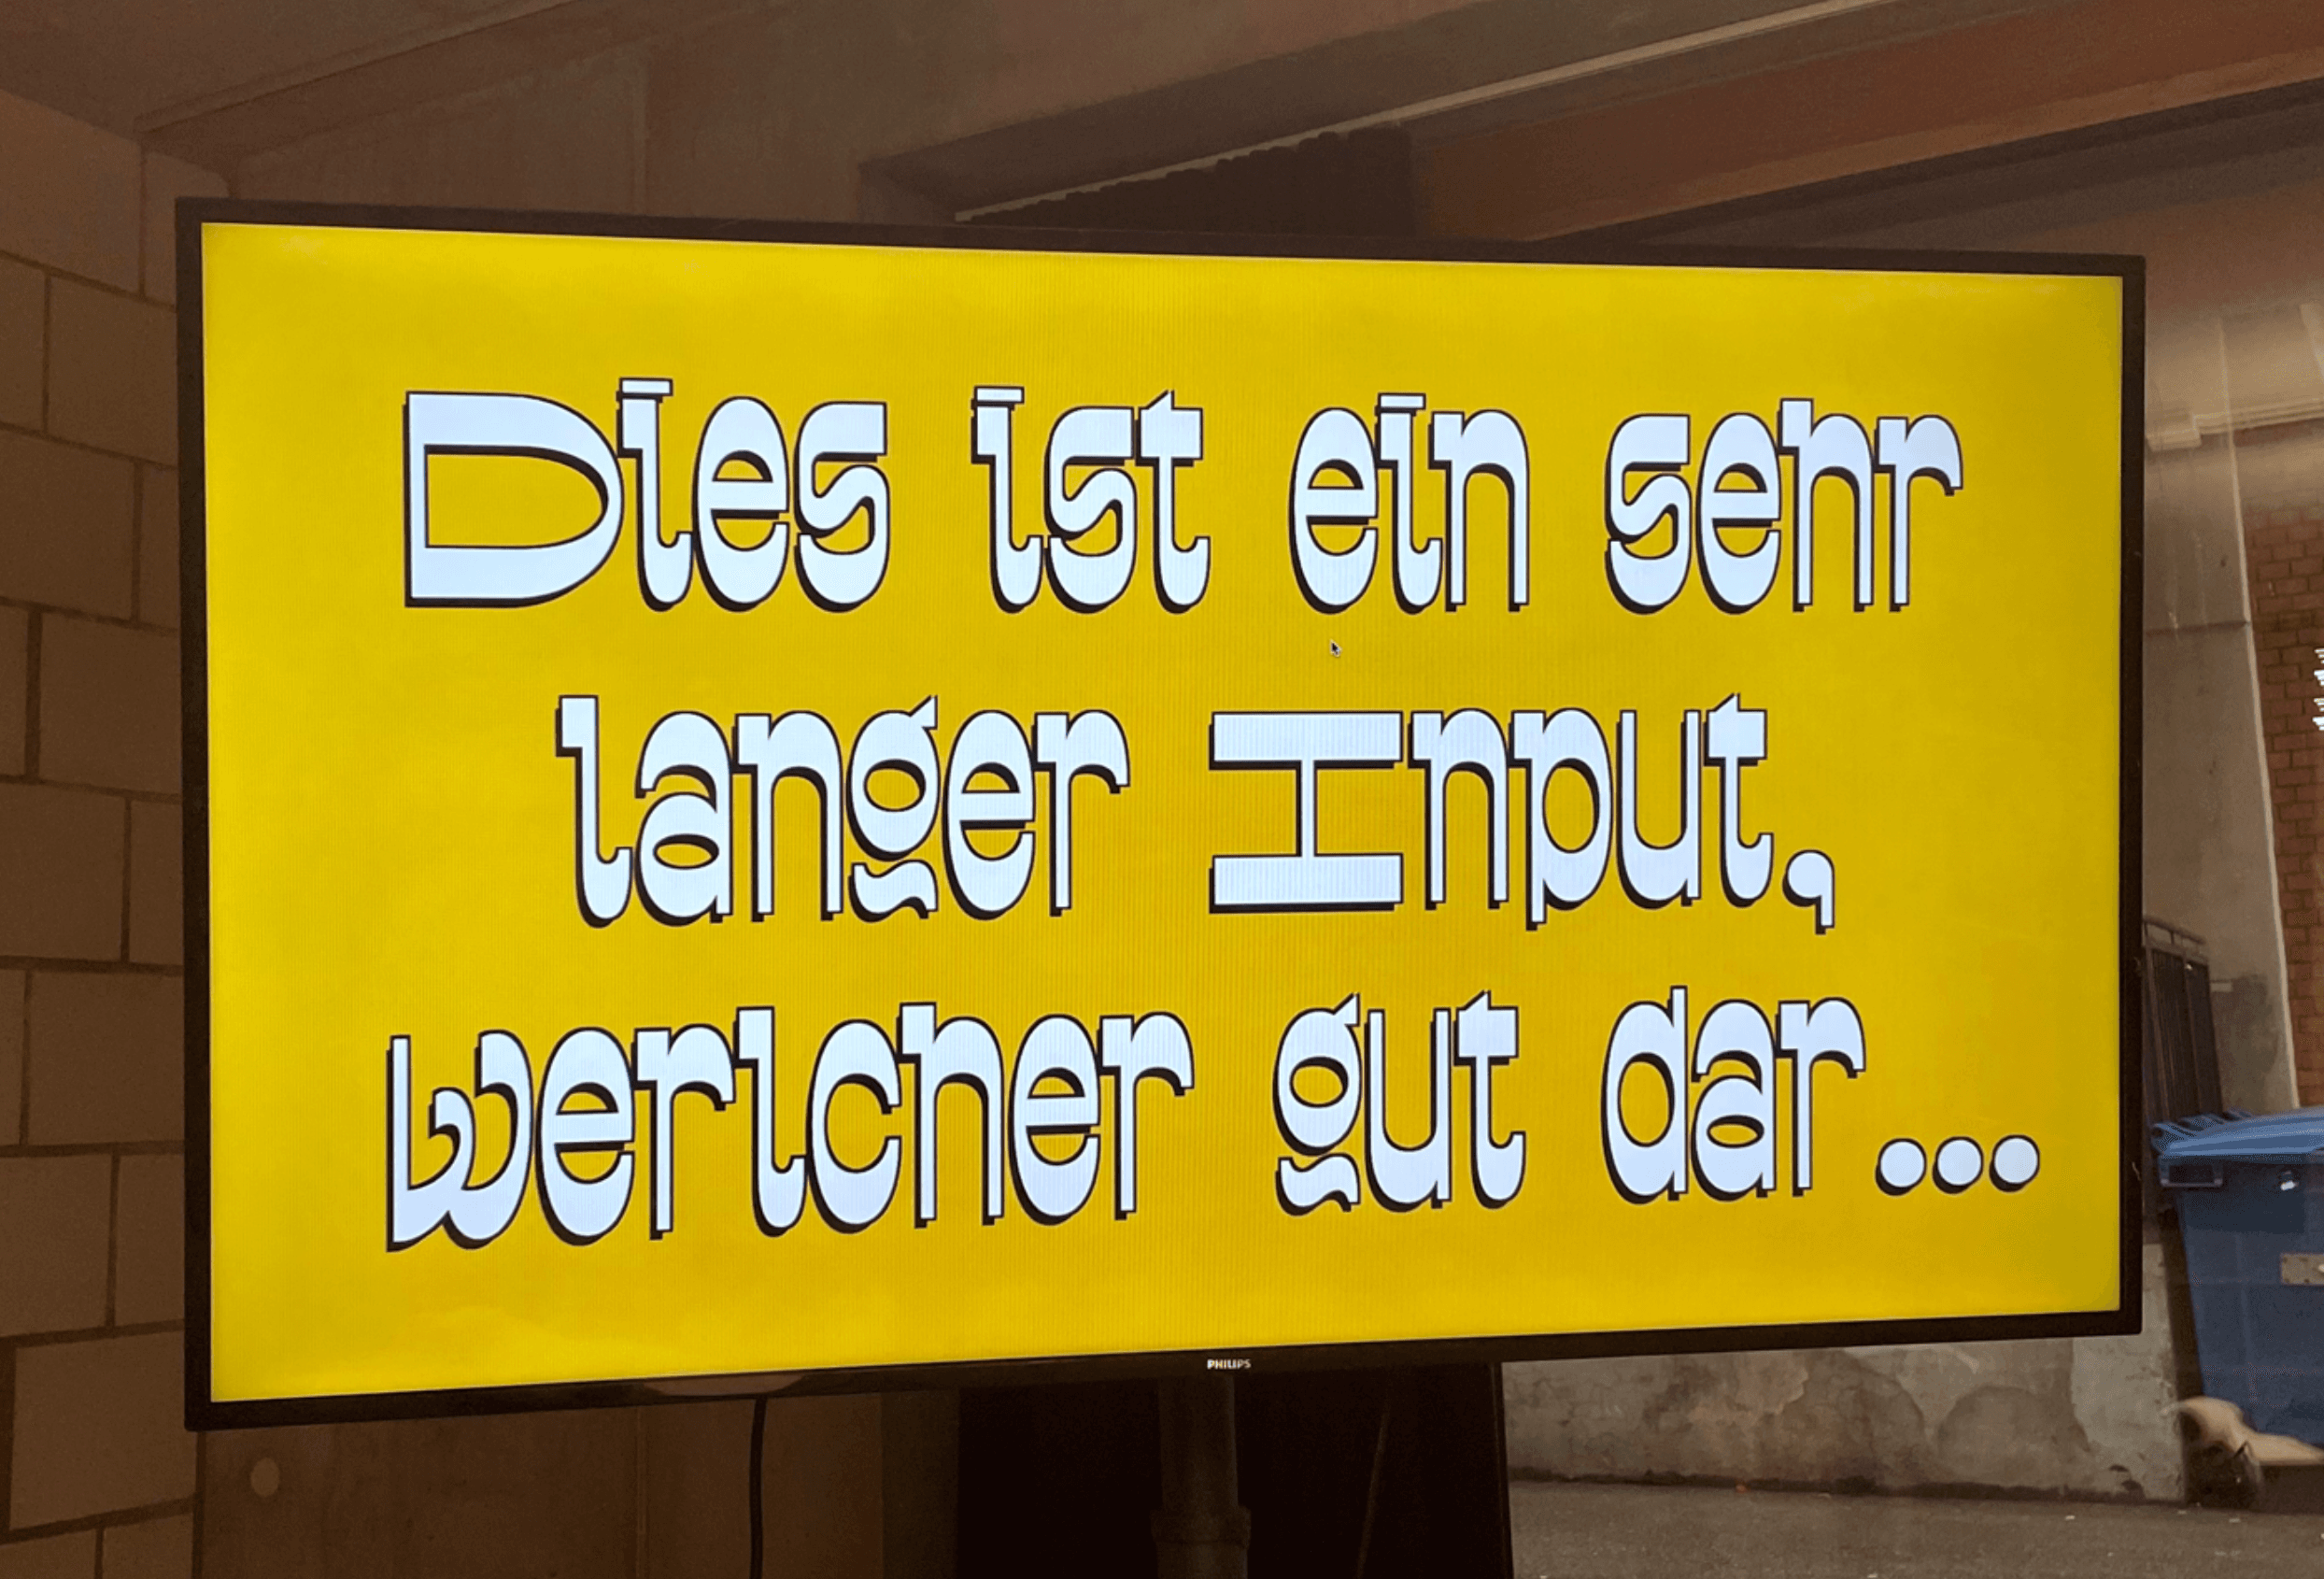 Figure 62: Correct Input Text; Source: Self-created Figure 62: Correct Input Text; Source: Self-created |
| - | This improvement has not yet been implemented and therefore was not tested. |
In the second round of testing, all cases passed. No further changes are needed for the application.
5.6 Design Review
To ensure that the designer of the project was satisfied with the implementation of the mockups, feedback was gathered from her.
She was very pleased with the result. However, she pointed out two things:
- The borders around the circles on the Welcome screen could be a bit thicker.
- The line spacing for the joke and the inputs could be a bit smaller.
As a result, the border of the bubble in the corresponding class was changed from one to four pixels. The reduction of the line spacing was documented in a ticket.
If this adjustment were to be made, it could potentially affect the behavior of the text, meaning further testing would be necessary.
6 Evaluation (A)
In the final IPERKA phase, it is evaluated how the work was carried out.
6.1 Approach
6.1.1 Tools
As planned, useful tools were used. One of them is Jira. The Kanban board contained in it reflected the current status during development.
The screenshot shows the development stage on the fourth day.
 Figure 63: Use of Jira
Source: Screenshot Jira
GitLab was also used as intended. From day two to day ten, a total of 148 commits were made. The graphic shows the days these were executed. It illustrates that the work was well distributed over the days.
 Figure 64: GitLab Commits
Source: Screenshot GitLab
The commit messages also meet the defined guidelines.
 Figure 65: Commit Messages
Source: Screenshot GitLab
OneDrive was used to secure the documents. The daily status was versioned there. The entire directory, including the documentation and schedules, was always accessible to the VF.
 Figure 66: OneDrive
Source: Screenshot OneDrive
6.1.2 Methods
It is quickly apparent from the code that conventions were adhered to. Concepts such as BEM and Atomic Design are reflected in the code. The logic is divided into components, all parts of the project are described in a README, and the linter runs without warnings.
6.2 Problems
It is rare for a project to proceed without any issues. A few problems occurred in this project as well.
6.2.1 OneDrive
The documentation and the schedule were synchronized with OneDrive. On day seven, the message appeared that the automatic saving was no longer working. When attempting to log in again, the error visible in the image occurred.
However, the problem was not catastrophic. There were two reasonable ways to work around this:
- Work with the online version
- Work locally and upload the document in the evening
I decided to go with the second option, as it avoided the risk of document formatting issues.
 Figure 67: OneDrive 403
Source: Screenshot Okta Error
The issue was then reported to IT support. They recommended closing the Office programs, restarting the laptop, and then deleting the Outlook account.
However, to avoid wasting time, this was initially not done.
6.2.2 GitLab
On day eight, there was a brief issue where the GitLab login for all employees was not working. However, this was not a major problem. During this time, local commits could still be created. Soon, access worked again, and the changes could be pushed to the repository.
6.2.3 IPERKA
IPERKA was a great help. The project management method brought structure to the project, but it had one major disadvantage. Due to the testing phase occurring in the final stage, it was very difficult to respond to errors.
In this project, only four test cases failed because the components were well divided and had already been checked separately. However, if the tests had been less successful, it would have been fatal. This is because there would likely have been little time left for significant improvements.
6.3 Time Management
The time estimation was extremely accurate. Surprisingly, despite the detailed planning, there were no deviations of more than two hours. This is also shown in the following diagram, which displays the times for the realization and control phases.
A beneficial aspect was that the estimates for the components also included time for documentation. This allowed the development to be continuously documented.
Next time, however, more time should be reserved for improvements. If more tests had failed, it would have meant a very stressful final phase.

Figure 68: Soll- und Ist-Zeit
Source: Selbst erstellt in Excel
Since exactly 80 hours were worked, this resulted in a balance of 0.
In addition to planning, milestones were also defined at the beginning. With the exception of “Tests successful,” these milestones were reached on time.
| Milestone | Planned Achievement Day | Achievement Day |
|---|---|---|
| Setup Gitlab, Nitro, Linting, Prettier, and CI | 3 | 3 |
| Welcome Screen | 4 | 4 |
| Input Screen | 5 | 5 |
| WeatherLocations Screen | 6 | 6 |
| Joke Screen | 7 | 7 |
| Loop with Animation | 7 | 7 |
| Tests successful | 8 | ⚠️ 9 |
| Evaluation completed | 9 | 9 |
| Submitted | 10 | 10 |
Overall, the time estimation was very satisfactory.
6.4 Result
The final product can now be displayed on the screens in the building, which is very satisfying. The images show how the info screen in the sixth floor is running.
The result meets the requirements across all areas. Not only the code, but also the approach and the documentation meet my personal expectations. This is due to the fact that a lot of importance was placed on these topics.

Figure 69: Info screen sixth floor - Weather
Source: Created by myself

Figure 70: Info screen sixth floor - Welcome
Source: Created by myself
6.5 Future
In the future, this website could be displayed on all screens. For that, additional laptops would be required, on which the application would be started.
Due to the modular structure of the application, it can also easily be extended with new screens. A schedule overview, lunch recommendations, a picture of the day, an event countdown, or a participation screen to promote interactivity—there are plenty of ideas. It is very likely that more screens will be added.
Of course, there are always improvements that can be made, such as optimizing the JS code. Although several hours were invested in improving these lines, there are still parts that can be written more elegantly.
The following image shows the Jira backlog, where all further optimization opportunities are documented.

Figure 71: Jira backlog
Source: Screenshot of Jira
Conclusion
I was able to achieve my personal goal of fulfilling all requirements. In the end, I even had some time to implement a small part of the improvements listed in the backlog.
I am very satisfied with the support from the VF. Whether in the office or via Teams, the VF was always easy to reach.
Nevertheless, I was able to work very independently during these ten days, proving my own abilities. I only asked for help in case of any uncertainties about the task or if I couldn’t move forward.
During the work, I naturally felt some pressure due to its importance. However, this motivated me more than stressed me. I was motivated for ten days to deliver an excellent project and achieve a good grade.
As shown in the work journals, I was initially unsure whether the software could be implemented in the given time. By mid-week, I was also slightly behind schedule. However, I did not let this discourage me and continued working focused and precisely. In the end, I was able to complete the project.
Looking back, I learned a lot from this project:
- As already mentioned, working with IPERKA carries the risk that problems are only discovered at the end. In my case, the tests did not reveal any major complications. However, I will make sure to test early and cleanly in the future.
- In frontend development, even if additional devices are not planned initially, an application should always be implemented with responsiveness in mind. It should not be difficult later to add additional viewports.
I set some sizes with pixel values. However, when it turned out that the screen had a different resolution, this negatively impacted the display.
In the future, I will set as many values as possible with relative units. - It is not a bad idea to place more value on documentation. In practice, this may not mean documenting the implementation on hundreds of pages.
But I will take the time to write clean Readmes. - I was convinced that documenting would hinder my implementation. While describing the implementation took time, it helped me rethink my approach and alternative solutions.
In the future, I will quickly reach for pen and paper when faced with problems. - The project went well due to the clear understanding of the task and the precise planning of the approach. In the future, I will analyze tasks even more thoroughly and consider possible solutions before implementation. It’s not wrong to double-check things that might seem obvious (like the screen resolution).
- This project made me realize once again how much I enjoy frontend work. During the first one and a half days, I looked forward to implementing the website.
Overall, I really enjoyed the project. I also liked that it was not a typical task. I enjoyed the challenges and was happy to tackle the task. I also hope that the application will be further developed at some point, maybe by me or even by a future apprentice.
Now, I hope that the employees and visitors will enjoy the screens and occasionally stop to have a look.
Glossary
| Term | Definition |
|---|---|
| API | An interface that allows applications to communicate with each other and exchange data. |
| Assets | Files such as images or videos that are embedded in a website or application. |
| Black-Box-Testing | A testing procedure where the internal functionality of an application is unknown, and only the output is tested. |
| Commit | An action in which changes to a code repository are saved. |
| Conventions | Common standards and rules followed in software development to ensure a consistent and easily understandable codebase. |
| Container | A Docker container is an executable environment that includes all the necessary dependencies and configurations to run an application independently of the underlying infrastructure. |
| Cookies | Small text files stored on a user’s computer containing information about the visit to a website. |
| CSS | Cascading Style Sheets, used for styling websites. |
| CSS-Vendor-Prefixes | Added by different browsers to implement new CSS features before they are officially standardized. |
| Docker | An open-source tool for creating, deploying, and managing containers. |
| DOM-Nodes | Elements that are part of a webpage document. |
| Div | An HTML element used to mark or style a section. |
| Endpoint | A specific URL through which an API can be called to retrieve or modify data. |
| Event Listener | Used to execute an action when an event occurs. |
| Experimental Decorators | An experimental JS feature that allows the use of decorators in classes and methods to change or extend the behavior of objects. |
| Extensions | Additional software modules to extend the functionality of an IDE. |
| Fallback | An alternative option that is used when the original element or function is unavailable. |
| Fetch | A function in JS used to asynchronously retrieve data from an API. |
| Figma | A design software. |
| Flexbox | A CSS layout model. |
| Font-face | A CSS rule used to define fonts. |
| Gantt | A graphical representation of project phases and tasks. Gantt is used in project management planning. |
| Handlebars | A templating engine used to dynamically generate HTML code. |
| Headers | Information included in an HTTP request or response to provide details about data transfer between client and server. |
| Helper | A function used to automate and simplify repetitive tasks. |
| XMLHttpRequest | An object in JS used for asynchronous requests to APIs. |
| IDE | An integrated development environment specifically designed for software development. |
| Image | A Docker image is a template containing all the necessary components to create a Docker container. |
| Jira | A tool for project management planning and tracking. |
| JS | JavaScript is a scripting language designed for web browsers. |
| JSON | A data format for storing structured data. |
| Library | A set of reusable code modules used to simplify development processes. |
| Lightweight | An application or framework designed for simplicity and low resource requirements. |
| Localhost | The hostname that refers to the local machine. |
| LTS | A long-term supported version of software or an operating system. |
| Memory | Refers to the area of memory where data is temporarily stored while a program is running. |
| Merge Request | A request to a Git repository to merge changes from one branch to another. |
| Mock Data | Artificially created test data, often generated for testing purposes. |
| Mockup | The design of a website. In this case, it was created with Figma. |
| Node Version Switcher | A tool used to switch between different versions of Node.js. |
| NPM | NPM is a tool for installing and managing libraries and tools for Node.js applications. |
| Opening and Closing Tag | The opening and closing HTML tags that mark the start and end of an HTML element. |
| Package | A collection of code modules and dependencies. Packages can be installed and managed. |
| package.json | A file in a Node.js project that contains information about the project and its dependencies. |
| Pattern | A recurring design or coding element used to simplify and standardize development processes. |
| Prefix | A string placed before another. |
| Profiling | The collection and analysis of information about the performance and behavior of a webpage. |
| Push | An action in which changes are sent to the repository. |
| Readme | A file that contains information and instructions for using the code. |
| Refactoring | The process of revising the source code to make it more efficient and maintainable. |
| Root | The top-level directory folder in a directory structure. |
| Routes | APIs written in Nitro that provide functions under a specific URL. |
| SVG | A vector-based graphics format. |
| Terminal | A program used to interact with a shell. |
| Theming | The customization of the appearance of a website. |
| TS | TypeScript is JS with strong typing. |
| Twig | A PHP templating engine used to generate dynamic HTML code. |
| Unit Tests | Tests that verify the functionality of individual parts of an application. |
| Vanilla-JS | Pure JS, without using frameworks. |
| Viewports | The visible area of a webpage on different devices, such as desktops, tablets, and smartphones. |
| VSC | Visual Studio Code is an integrated development environment by Microsoft. |
| White-Box-Testing | A testing procedure where the internal code of an application is known and tested specifically. |
Literaturverzeichnis
Augat, L. (28. März 2022). TimeTrack. Die beliebtesten Vorgehensmodelle im Projektmanagement.
Abgerufen von: https://www.timetrackapp.com/blog/vorgehensmodell-projektmanagement/
BEM. (10. März 2023). BEM. Introduction.
Abgerufen von: https://getbem.com/introduction/
Bexio. (27. Oktober 2020). Bexio. Mit der IPERKA-Methode bessere Entscheidungen für Ihr KMU treffen.
Abgerufen von: www.bexio.com/de-CH/blog/view/iperka-methode
ChatGPT. (13. März 2023). ChatGPT.
Abgerufen von: https://chat.openai.com
Elias. (13. März 2023). Stack Overflow. Fetch multiple URLs at the same time?
Abgerufen von: https://stackoverflow.com/questions/59037553/fetch-multiple-urls-at-the-same-time
Google. (14. März 2023). Google Maps Help. Discover coordinates or search by latitude & longitude.
Abgerufen von: https://support.google.com/maps/answer/18539?hl=en&co=GENIE.Platform%3DDesktop
Merkle. (7. März 2023). Github. generator-nitro.
Abgerufen von: https://github.com/merkle-open/generator-nitro/tree/develop/packages/generator-nitro
NodeJS. (7. März 2023). NodeJS. Releases.
Abgerufen von: https://nodejs.dev/en/about/releases/
OpenWeather. (6. März 2023). OpenWeather. Weather API.
Abgerufen von: https://openweathermap.org/api
OpenWeather. (7. März 2023). OpenWeather. Pricing.
Abgerufen von: https://openweathermap.org/price
Pandey, A. (7. März 2023). Meidum. Understanding of Font Formats: TTF, OTF, WOFF, EOT & SVG.
Abgerufen von: https://medium.com/@aitareydesign/understanding-of-font-formats-ttf-otf-woff-eot-svg-e55e00a1ef2
Shiklo, B. (6. Oktober 2019). ScienceSoft. 8 Vorgehensmodelle der Softwareentwicklung: mit Grafiken erklärt.
Abgerufen von: https://scnsoft.de/blog/vorgehensmodelle-der-softwareentwicklung
Wild, K. (7. März 2023). The Dach Hub. Patterns in Nitro.
Abgerufen von: https://thedachhub.merkleinc.com/display/EDU/Patterns+in+Nitro
Wild, K. (9. März 2023). The Dach Hub. CI/CD.
Abgerufen von: https://thedachhub.merkleinc.com/pages/viewpage.action?pageId=897224118
Wild, K. (7. März 2023). Wiki. AJAX.
Abgerufen von: https://wiki.namics.com/display/lehrlinge/AJAX
Wild, K. (7. März 2023). Wiki. Keyframes vs. Transitions.
Abgerufen von: https://wiki.namics.com/display/lehrlinge/Keyframes+vs.+Transition